
How to Stop Backpowering on Raspberry Pi 1
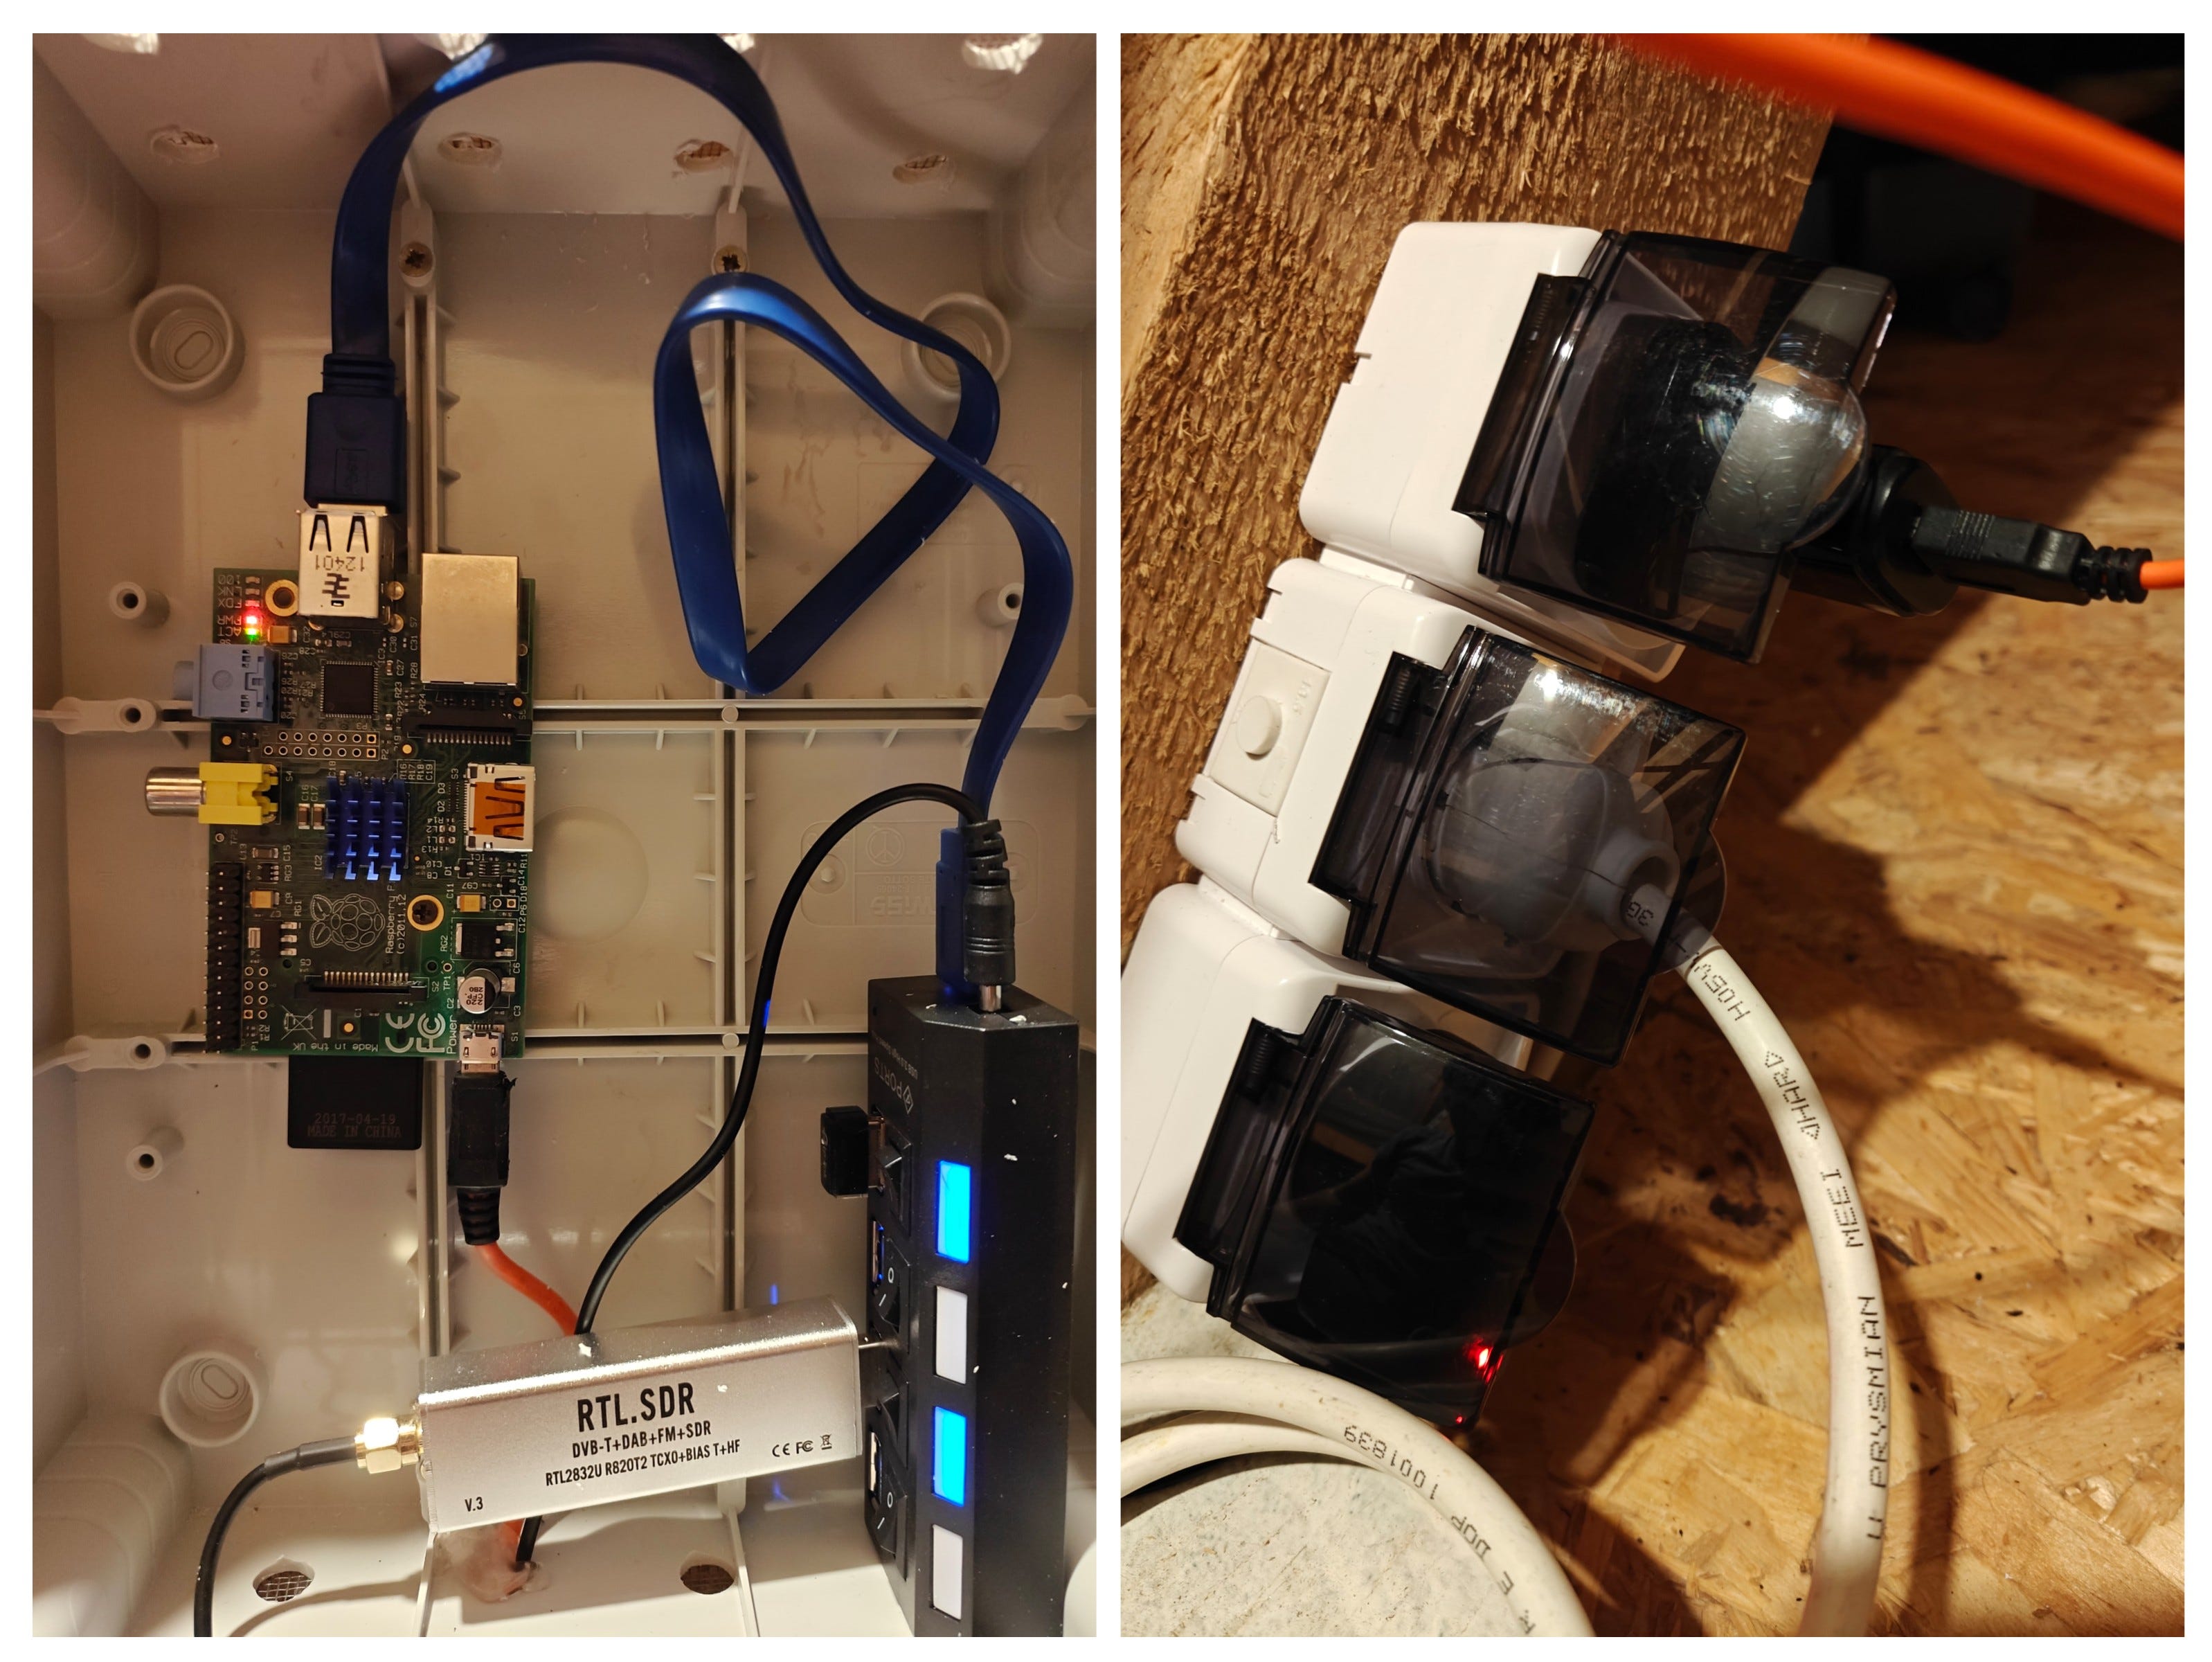
I have an earlier article about my Flightradar24 feeder using my Raspbbery 1 which is working great since the installation.
But then I noticed something strange, and slightly alarming.
If you plug your Raspberry Pi (in this article I always will talk about the Pi 1) into the wall, without plugging the USB hub into its own power supply, the hub’s LED lights up.
Conversely, if you plug the hub into the wall but leave the Pi unplugged, the Pi’s LEDs also light up!
Your intuition should scream: “Something’s wrong!”
You are exactly right. You have encountered a direct energy flow where none should be. Let’s talk about why this is dangerous and, more importantly, how you can fix it safely, easily, and reversibly with a tiny piece of tape.
The Danger of the “Direct Energy Flow”
This phenomenon is known as “backpowering” (or back-feeding). It happens because many budget-friendly powered USB hubs cut costs by omitting a simple component: a diode on the upstream USB connection.
This diode is supposed to let data flow both ways but only let power flow one way (from the host to the hub). Without it, the 5V power line in your USB cable is essentially a wide-open bridge between two different power supplies.
Your concern about “fighting” voltages is 100% correct. No two power supplies output exactly the same voltage. One might be 5.01V, and the other might be 4.98V. This sounds tiny, but in the world of regulation loops, it’s a disaster.
The power supply with the higher voltage will constantly try to push current backward into the regulator of the other power supply, which is now acting as a current “sink.” This causes several serious issues:
Unstable operation: The regulators can’t stabilize, leading to voltage ripple.
Overheating: The “sink” power supply will generate excess heat as it fights the incoming current.
Component stress: This constant “back-and-forth” dramatically shortens the lifespan of both power supplies.
SD card corruption: Power instability is the leading cause of corrupted Raspberry Pi SD cards.
In my case, I was running an SDR and a Wi-Fi dongle—two very power-hungry devices—but it was working fine without crashes.
The Solution: Severing the Power Bridge (Without Surgery)
The goal is simple: We need to sever the 5V connection between the Raspberry Pi and the USB Hub while leaving the two essential data lines and the common ground connection intact.
There are two ways to do this:
Cable Surgery: You can carefully slice open the USB cable, find the red wire (the 5V power line), snip it, and tape it off. This is permanent, and if you mess up, you’ve ruined a cable.
The Tape Trick (Our Weapon of Choice): You can physically block the 5V contact pin inside the USB plug with a tiny piece of non-conductive tape. This is completely reversible and much less stressful!
How to Perform the “Tape Trick”
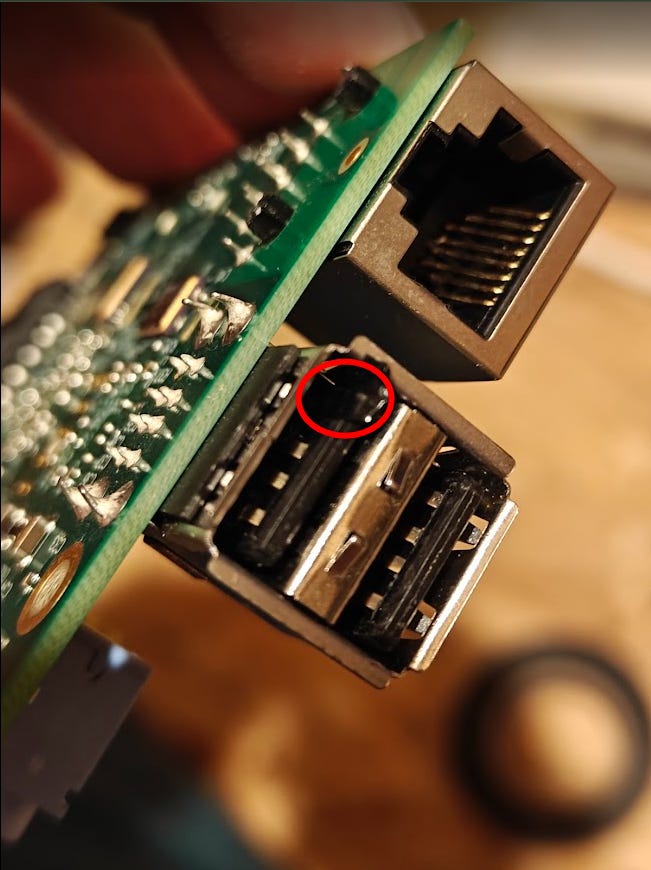
This method is incredibly elegant, but it is also a delicate operation. The pins inside a USB plug are tiny and close together.
What You’ll Need:
The USB cable that connects your Raspberry Pi to the USB Hub. You are modifying the Standard USB-A plug (the flat, rectangular one) that plugs into your Pi.
Ultra-thin non-conductive material. * Standard electrical tape is usually too thick and will prevent the USB plug from seating properly, disconnecting your data.
Use Kapton tape (the yellowish electronic tape) or clear Scotch tape (office tape). In my case, I successfully used thin office tape.
Tweezers or a fine-tipped needle (essential for positioning the tape).
Scissors.
Step-by-Step Guide:
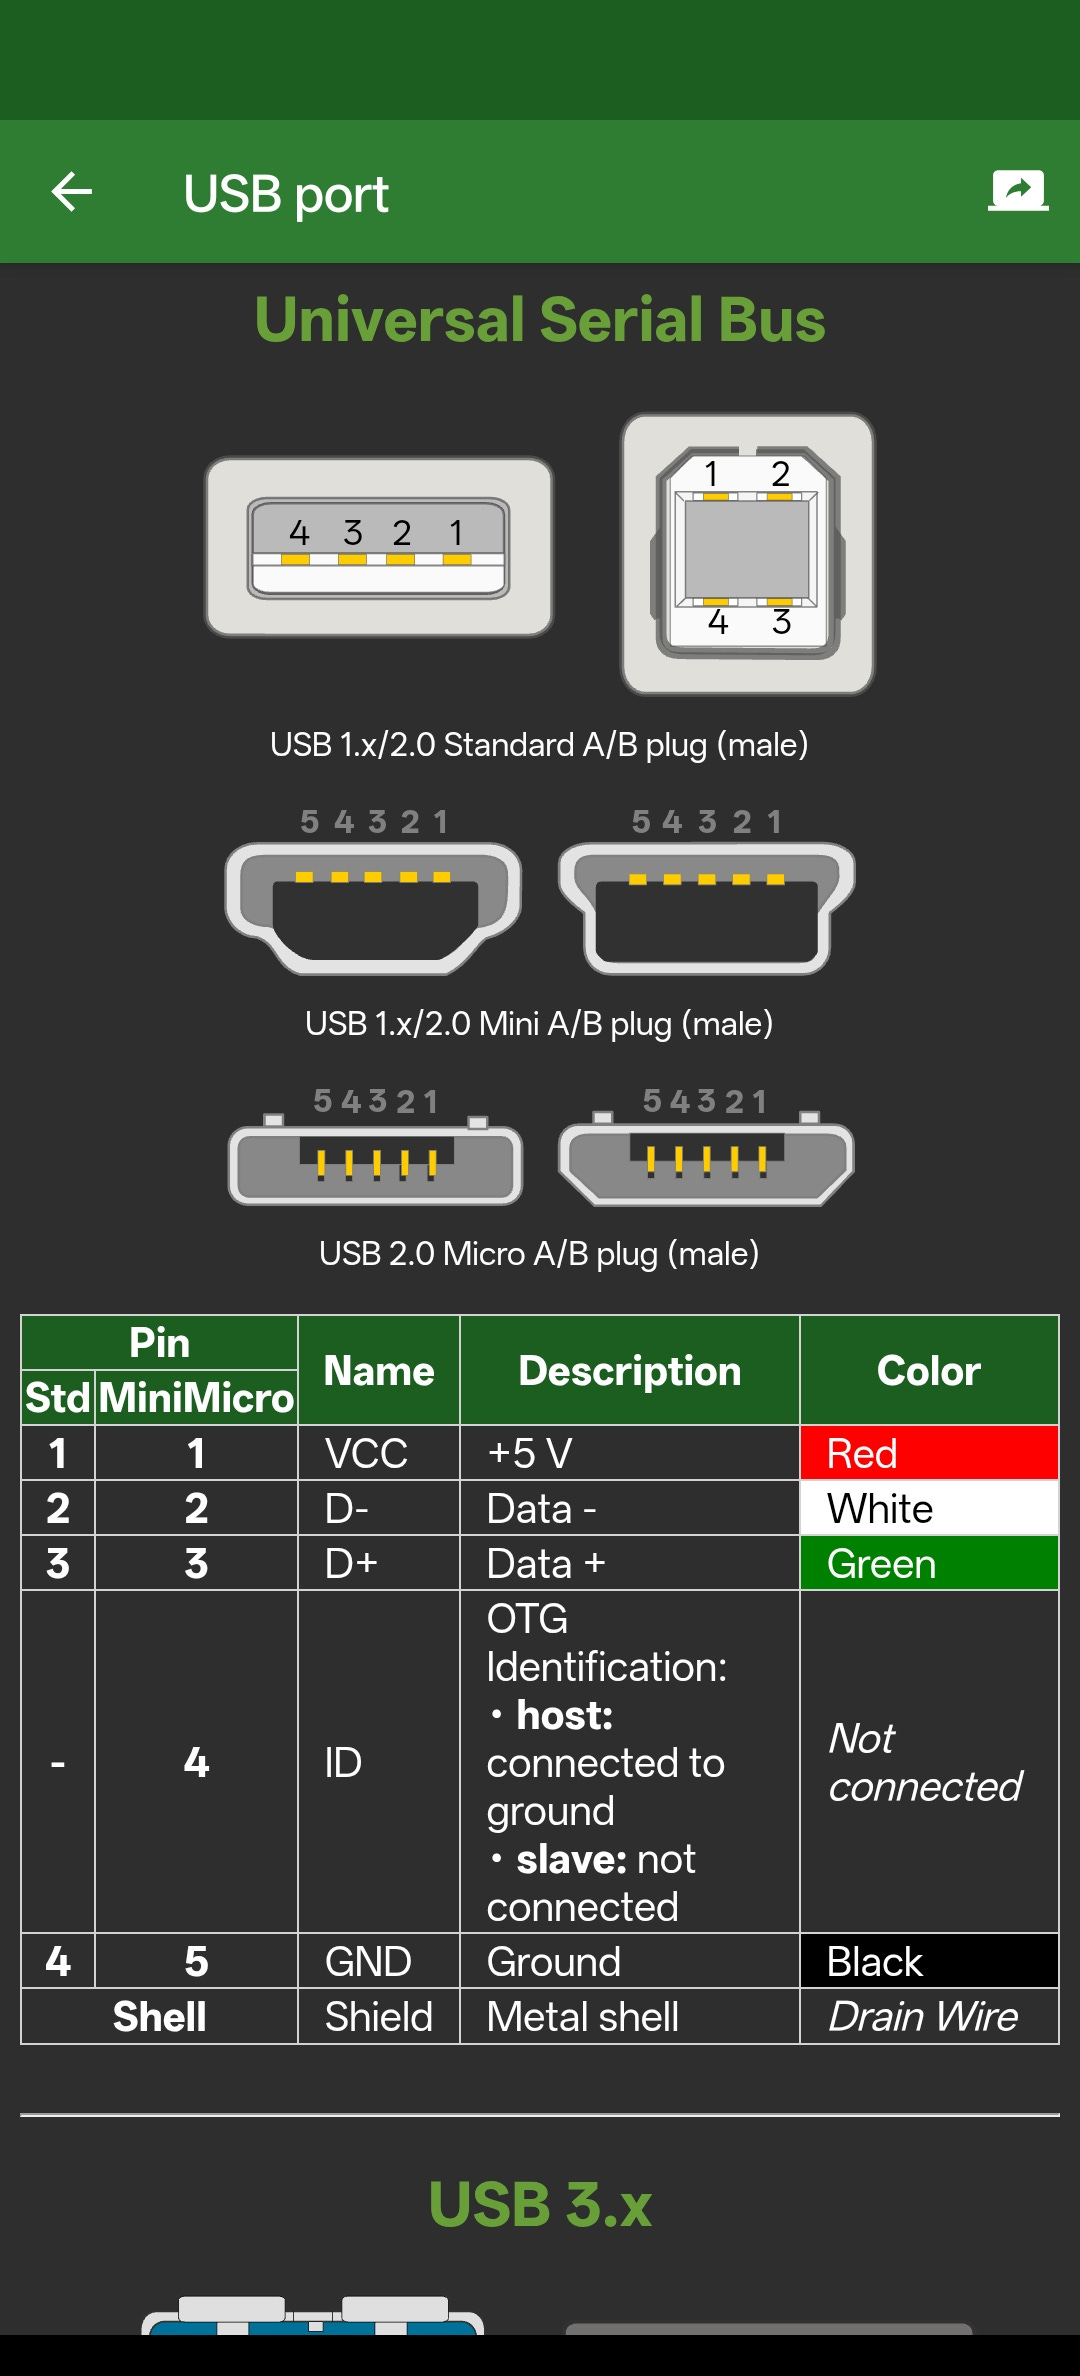
1. Identify the 5V Pin (Pin 1)
Look into the end of the male USB-A connector. Orient the plug so that the plastic tongue (the block with the four metal strips) is on the bottom, and the empty space is at the top.
The metal strips (pins) are numbered 1 to 4 from right to left:
Pin 1 (Far Right): 5V Power <-- OUR TARGET
Pin 2: Data -
Pin 3: Data +
Pin 4 (Far Left): Ground
2. Cut the Tape
You need to cut a tiny, rectangular sliver of your thin tape. It must be wide enough to cover Pin 1, but only Pin 1. It should be about 1–2mm wide and about 1cm long.
3. Apply the Tape
Using your tweezers, carefully slide the tape sliver over only the far-right metal strip (Pin 1). Make sure you don’t cover the neighboring Data- pin (Pin 2).
Gently press the tape down against the plastic tongue using your tweezers or the tip of a toothpick. Fold any excess tape over the front edge of the plastic tongue and tuck it underneath so it stays firmly in place when you plug it in.
4. Test and Verify
Plug the freshly taped cable into your Raspberry Pi. The tape is your physical power-break.
Plug ONLY the USB hub into its wall adapter. Look at your Raspberry Pi. If the modification worked, the Pi’s LEDs should stay OFF.
Now, plug your Raspberry Pi into its own wall adapter. The Pi should boot normally.
Check your peripherals. If the tape is positioned correctly (not blocking the data pins), the Pi should still be able to “see” your Wi-Fi dongle and SDR on the hub.
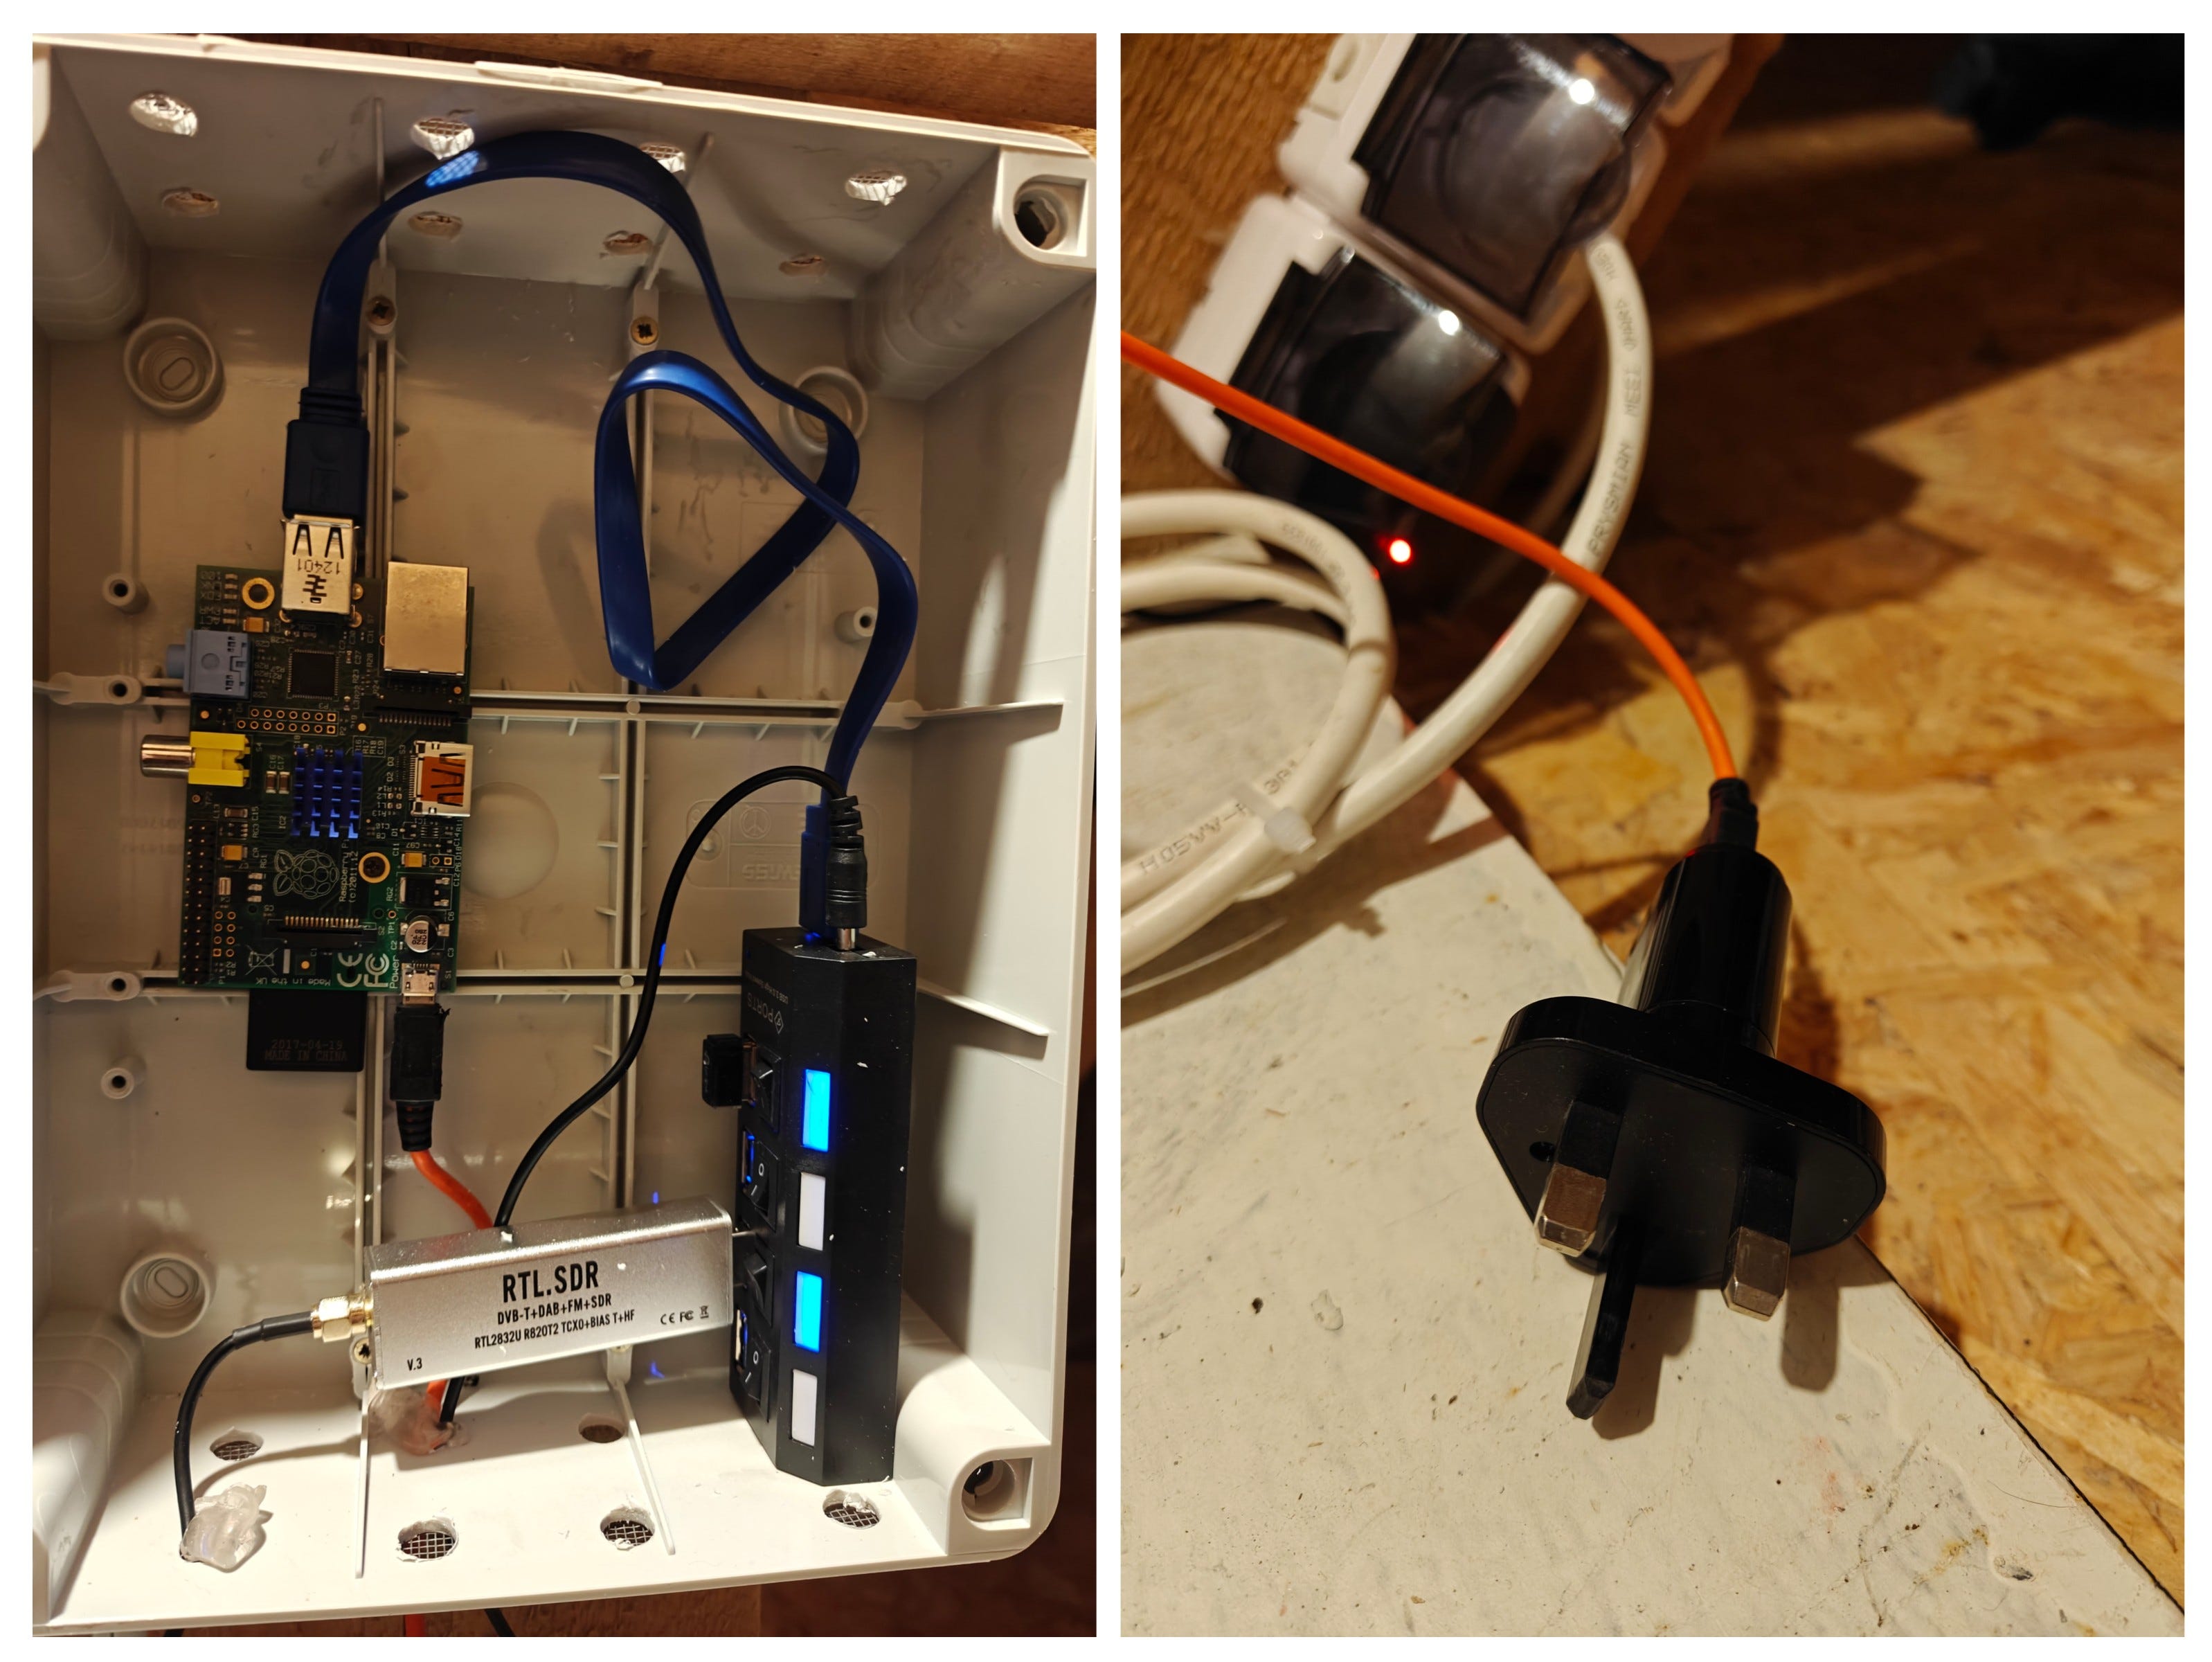
Success: The plugged in USB Hub is no longer backpowering the Pi 1.
Conclusion: Electrically Safe
By using this simple “tape trick,” you’ve created the perfect isolated setup. Your Raspberry Pi and USB Hub now each run from their own dedicated power supplies, eliminating any dangerous backpowering loop. This dramatically increases the reliability and longevity of all your hardware.
Best of all, you didn’t have to permanently destroy any cables or spend money on expensive “data-only” adapters. If you ever need to use that cable normally again, you just peel the tape off. It’s the kind of simple, elegant solution that makes DIY projects so rewarding!