
The Ultimate Way to SSH without port forwaring or without VPN
Indroducing Cloudflere Tunnel
Let’s be honest: setting up remote servers at home can be a pain.
If you have a home server, or a NAS that you need to access when you aren’t home, do not “Just port forward port 22 on your router.”
Opening port 22 to the public internet is like leaving your front door wide open with a neon sign pointing to it. Bots and hackers are scanning the entire internet 24/7 looking for open SSH ports to brute-force.
Furthermore, what if your ISP uses CGNAT? What if your IP changes daily? What if you move the device to your parents’ house? Port forwarding breaks instantly.
I need to relocate one of my servers where I cannot just use my home VPN.
Today, I’m going to show you the modern, secure, and frankly incredibly cool way to solve this using Cloudflare.
It’s free, it requires zero open ports on your router, and it works from anywhere.
The Magic: Cloudflare Tunnels
We are going to use a tool called Cloudflared to create a secure “tunnel” from your device out to Cloudflare’s network.
Think of it this way: Instead of opening a window in your house (port forwarding) and hoping only the good guys climb in, your server makes an outbound, encrypted phone call to Cloudflare and holds the line open. When you want to connect, you connect to Cloudflare, and they patch you through that pre-established line.
The best part? We are going to put a “lock” on that connection. Before you even see the SSH login prompt, you’ll have to authenticate with your email address via a web browser. It’s fortress-level security for your home lab.
Prerequisites
A Raspberry Pi (or any Linux machine) running at home.
A free Cloudflare account.
I used my domain name managed by Cloudflare (you can get cheap ones for a few dollars a year, I did not do research if there are other ways, but I guess have).
Step 1: Create the Tunnel in the Dashboard
We are going to do this the easy way, using Cloudflare’s Zero Trust dashboard.
Log into your Cloudflare dashboard and navigate to the Zero Trust section.
Go to Networks > Connectors and click Create a Tunnel.
Name it something recognizable (like
home-pi) and select Cloudflared as the connector type.Cloudflare will present you with installation commands for different operating systems. Select your architecture (usually Debian 64-bit or 32-bit).
You just copy that single command and paste it into your terminal. It automatically installs the service, links it to your account, and sets it to start on boot.
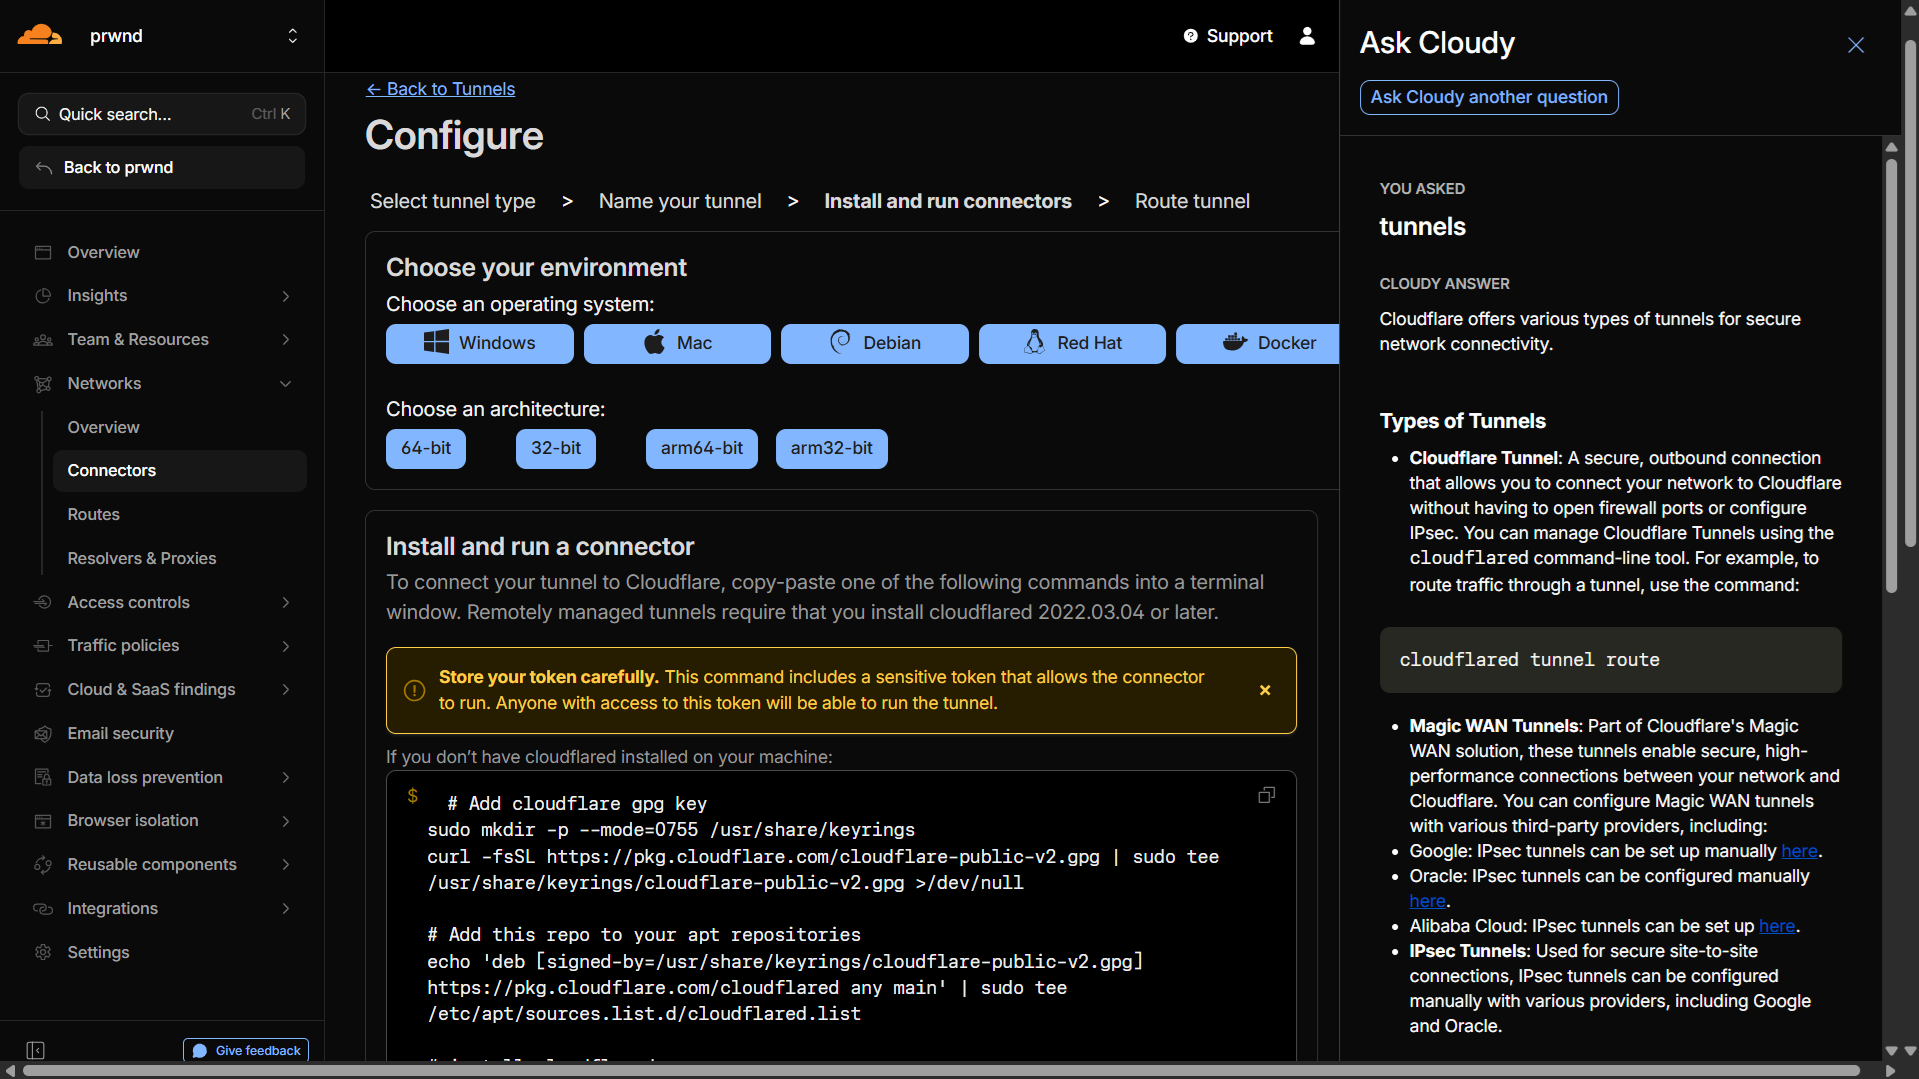
It literally just takes copying and pasting one command to link your Pi to the cloud.)
Once the connector is running, you’ll see it turn green in the dashboard. Click Next.
Step 2: Route Traffic to Your Pi
Now we need to tell Cloudflare where to send the traffic. We are going to assign a subdomain (like ssh.mydomain.com) that will point directly to the SSH port on your Pi.
In the “Public Hostnames” tab:
Subdomain: Choose something like
pi-terminal.Domain: Select your domain.
Service Type: Choose
SSH.URL: Enter
localhost:”your_ssh_port”
Click Save Tunnel.
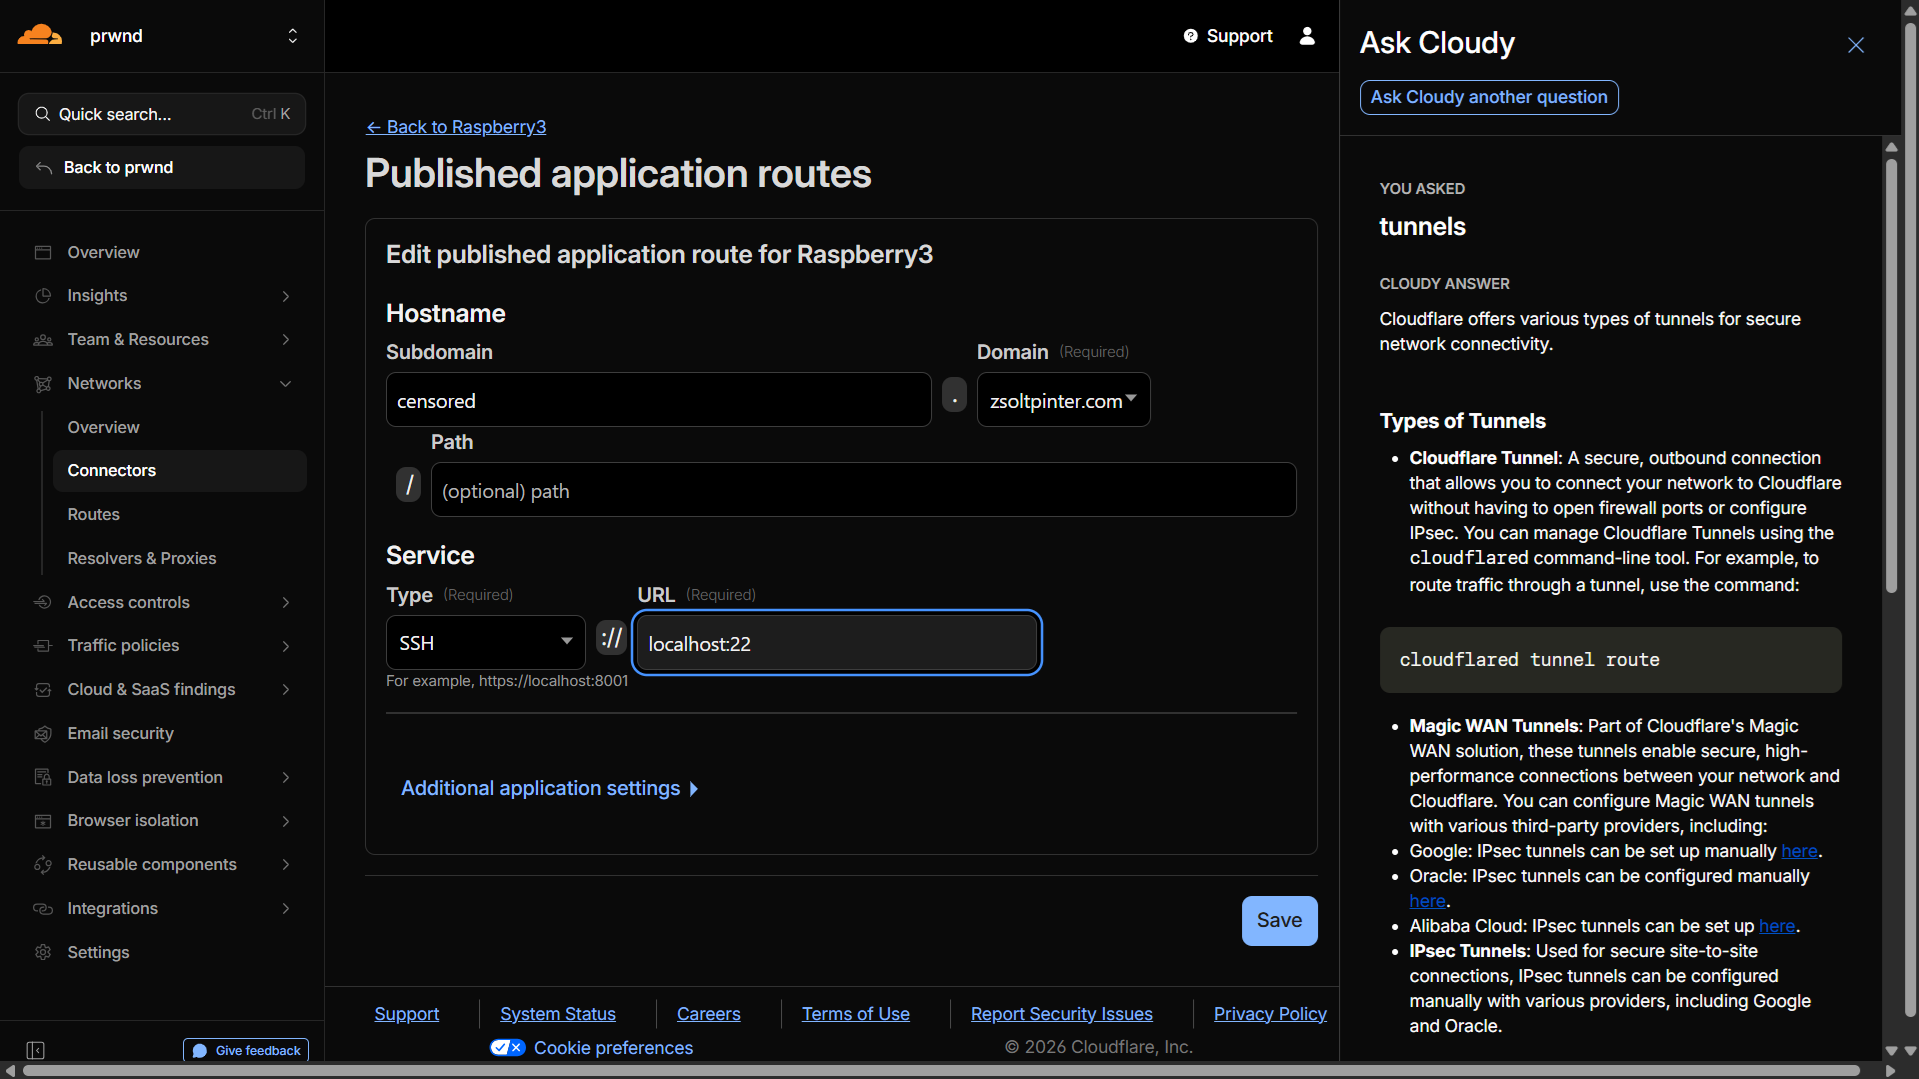
Telling Cloudflare to route traffic from a subdomain straight to the Pi’s internal SSH port.)
At this point, the tunnel is active. But it’s wide open. Anyone who visits that URL could try to guess your Pi’s password. Let’s lock it down.
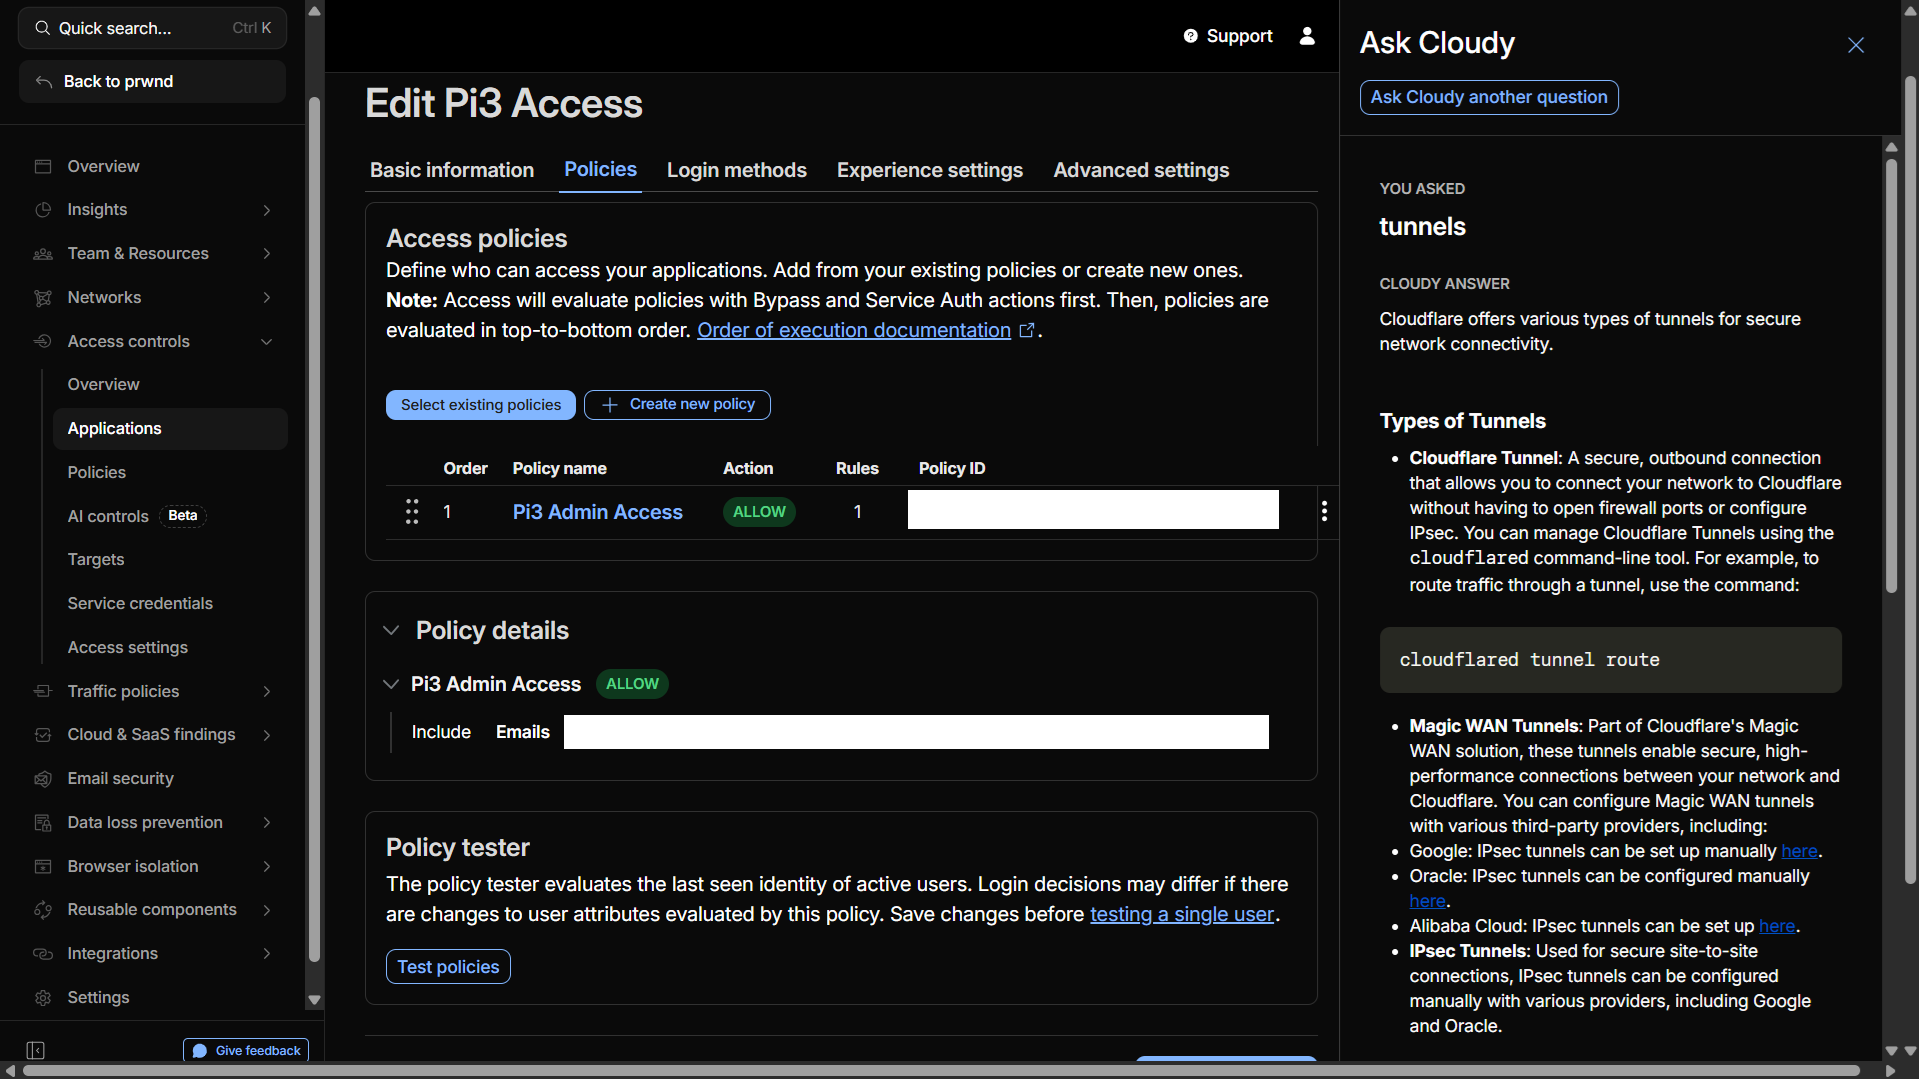
Step 3: The “Cool Part” - Securing it with a Browser Terminal
This is where this setup becomes a game-changer. We are going to put an authentication layer in front of the SSH connection using Cloudflare Access.
As a bonus, we will configure it so we can get a full SSH terminal right inside a web browser—no plugins or SSH clients required on your laptop.
On the left sidebar of the Zero Trust dashboard, go to Access > Applications.
Click Add an Application and select Self-hosted.
Give it a name, and enter the exact subdomain you just created (e.g.,
pi-terminal.mydomain.com).
Now, we create a Policy. This dictates WHO is allowed in.
Name the policy “Admin Access”.
Set the Action to Allow.
Create a rule that says Include > Email > [Your Email Address].
Finally, the magic setting for browser access:
Go to the Settings tab of the application configuration, scroll down to Browser rendering, and set it to SSH.
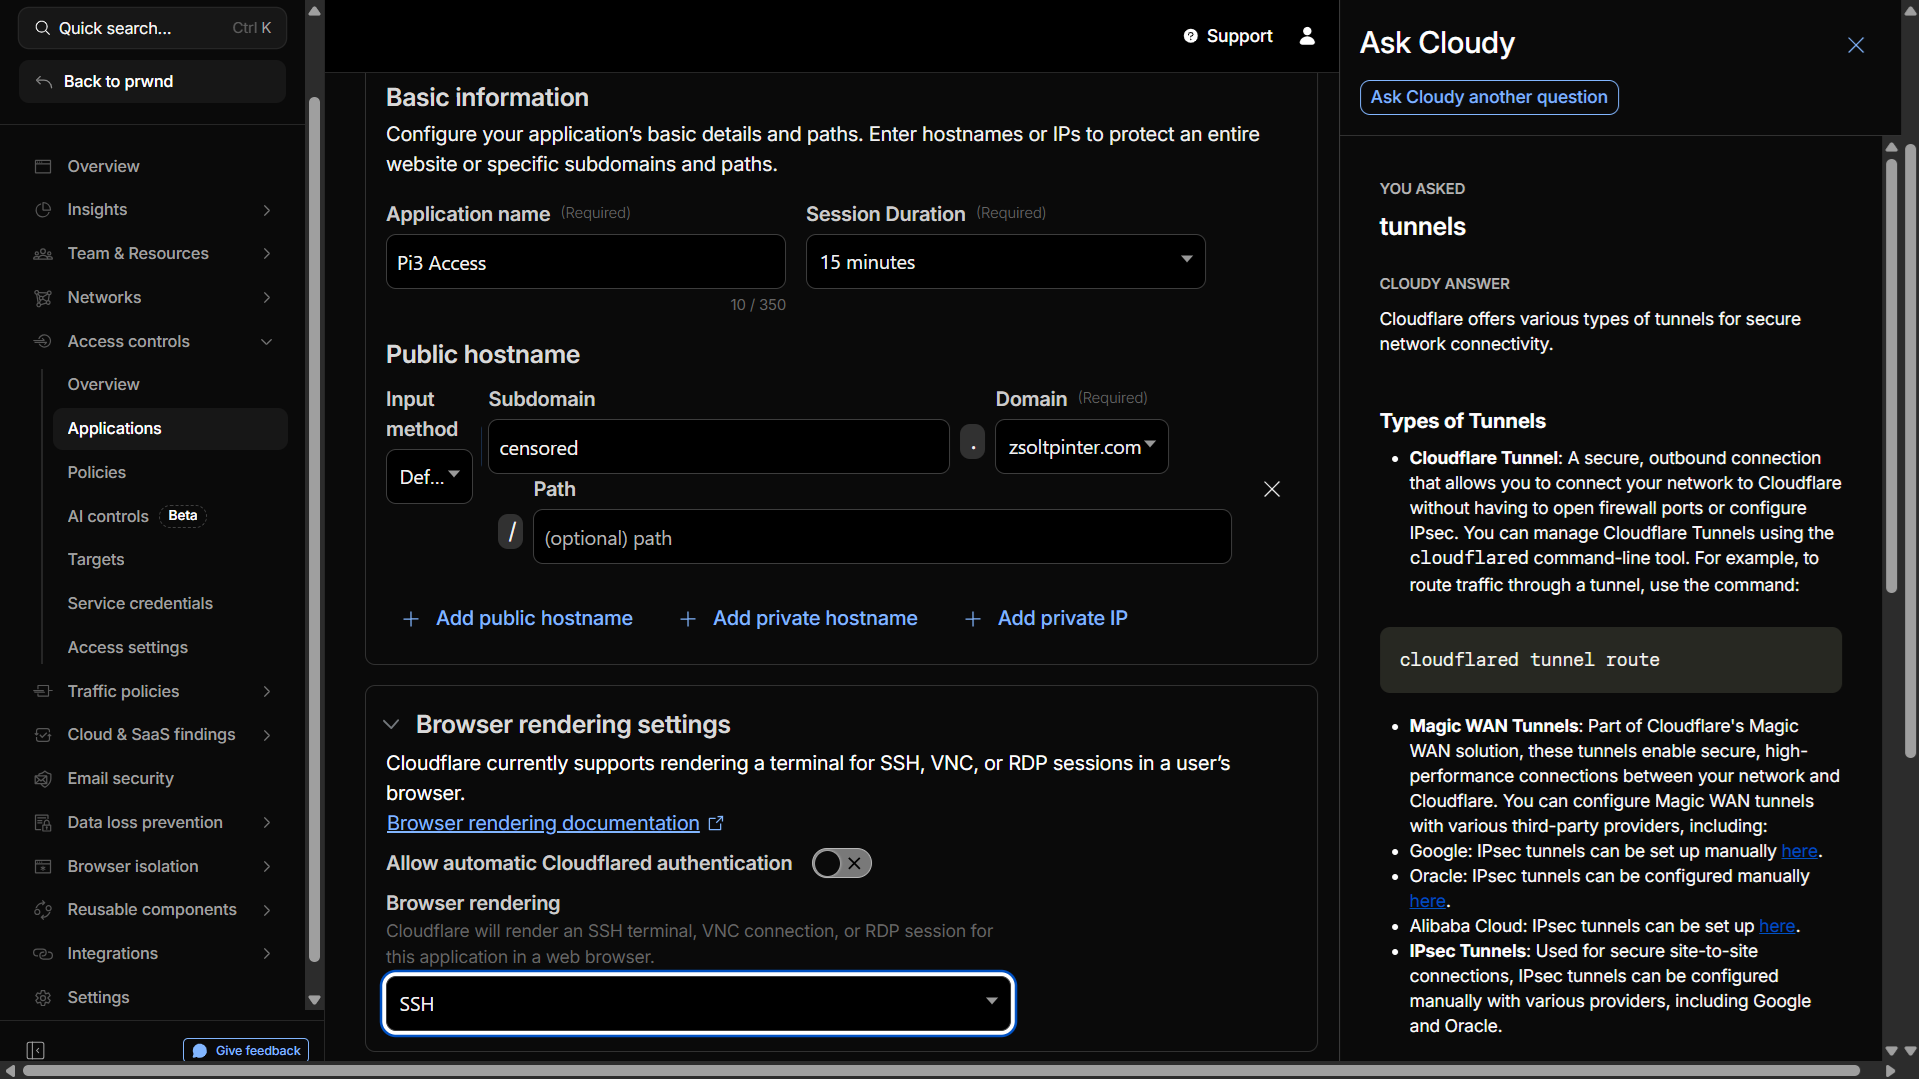
The secret sauce. Enabling browser rendering turns Chrome or Safari into a secure SSH client.)
Click Add Application. You’re done.
The Final Result
So, how does it work in practice?
You are at a coffee shop, or on your phone, and you need to check your Pi. You just open a web browser and go to
https://subdomain.yourdomain.com
Instead of a scary terminal prompt, you are greeted with a Cloudflare login screen asking for your email. You enter it, get a 6-digit code sent to your inbox, and type it in.
Only after you pass that security check does Cloudflare render a beautiful, fully functional terminal right in your browser window, asking for your Pi’s username and password.
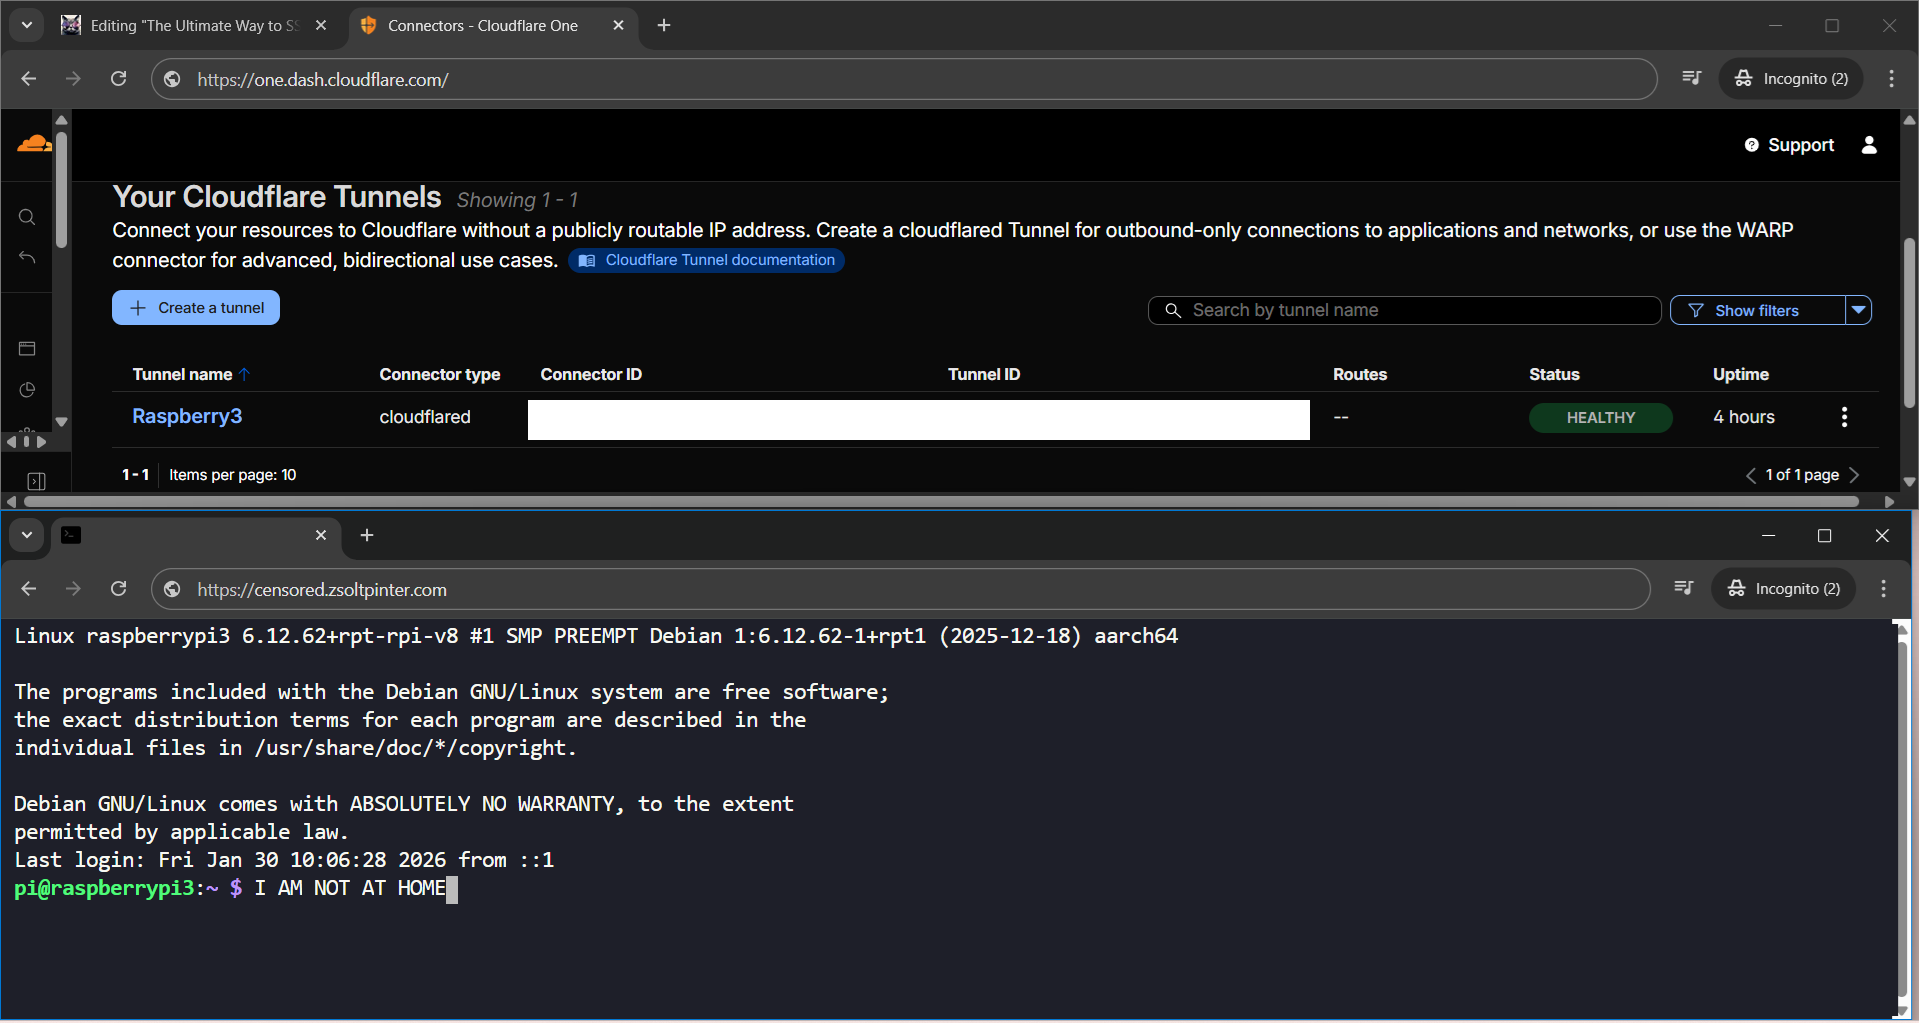
Success! A secure terminal, accessible from anywhere, with zero open ports on my home router.)
It’s secure, it’s robust, and if you move the Pi to a different network, it just automatically reconnects. Say goodbye to port forwarding forever.
Now I can relocate my server anywhere, and I will keep having remote access.