
I Built the Holy Grail of Home Routers (And You Can Too)
The Story of My Own Legendary Custom-built OpenWrt Router
The WiFi on my 13-year-old WDR4300 N750 finally stopped working (likely dried-out capacitors near the power line), but this failure was a blessing in disguise. It was the perfect kick-off to upgrade my home network.
I didn’t just want “internet access.” I wanted Mission Control.
I wanted the All-Seeing Eye—real-time analytics, enterprise-grade stability, network-wide ad-blocking, and a failover system that would make a sysadmin weep with joy. For the last few days, I embarked on a mission to do it all on a second-hand Raspberry Pi 4.
Most people said it only has one NIC. It would crash. They said the SD card would die in a month. They were wrong. Here is how I built the Holy Grail of Home Routers.
Part 1: Heavy Metal and Raw Power
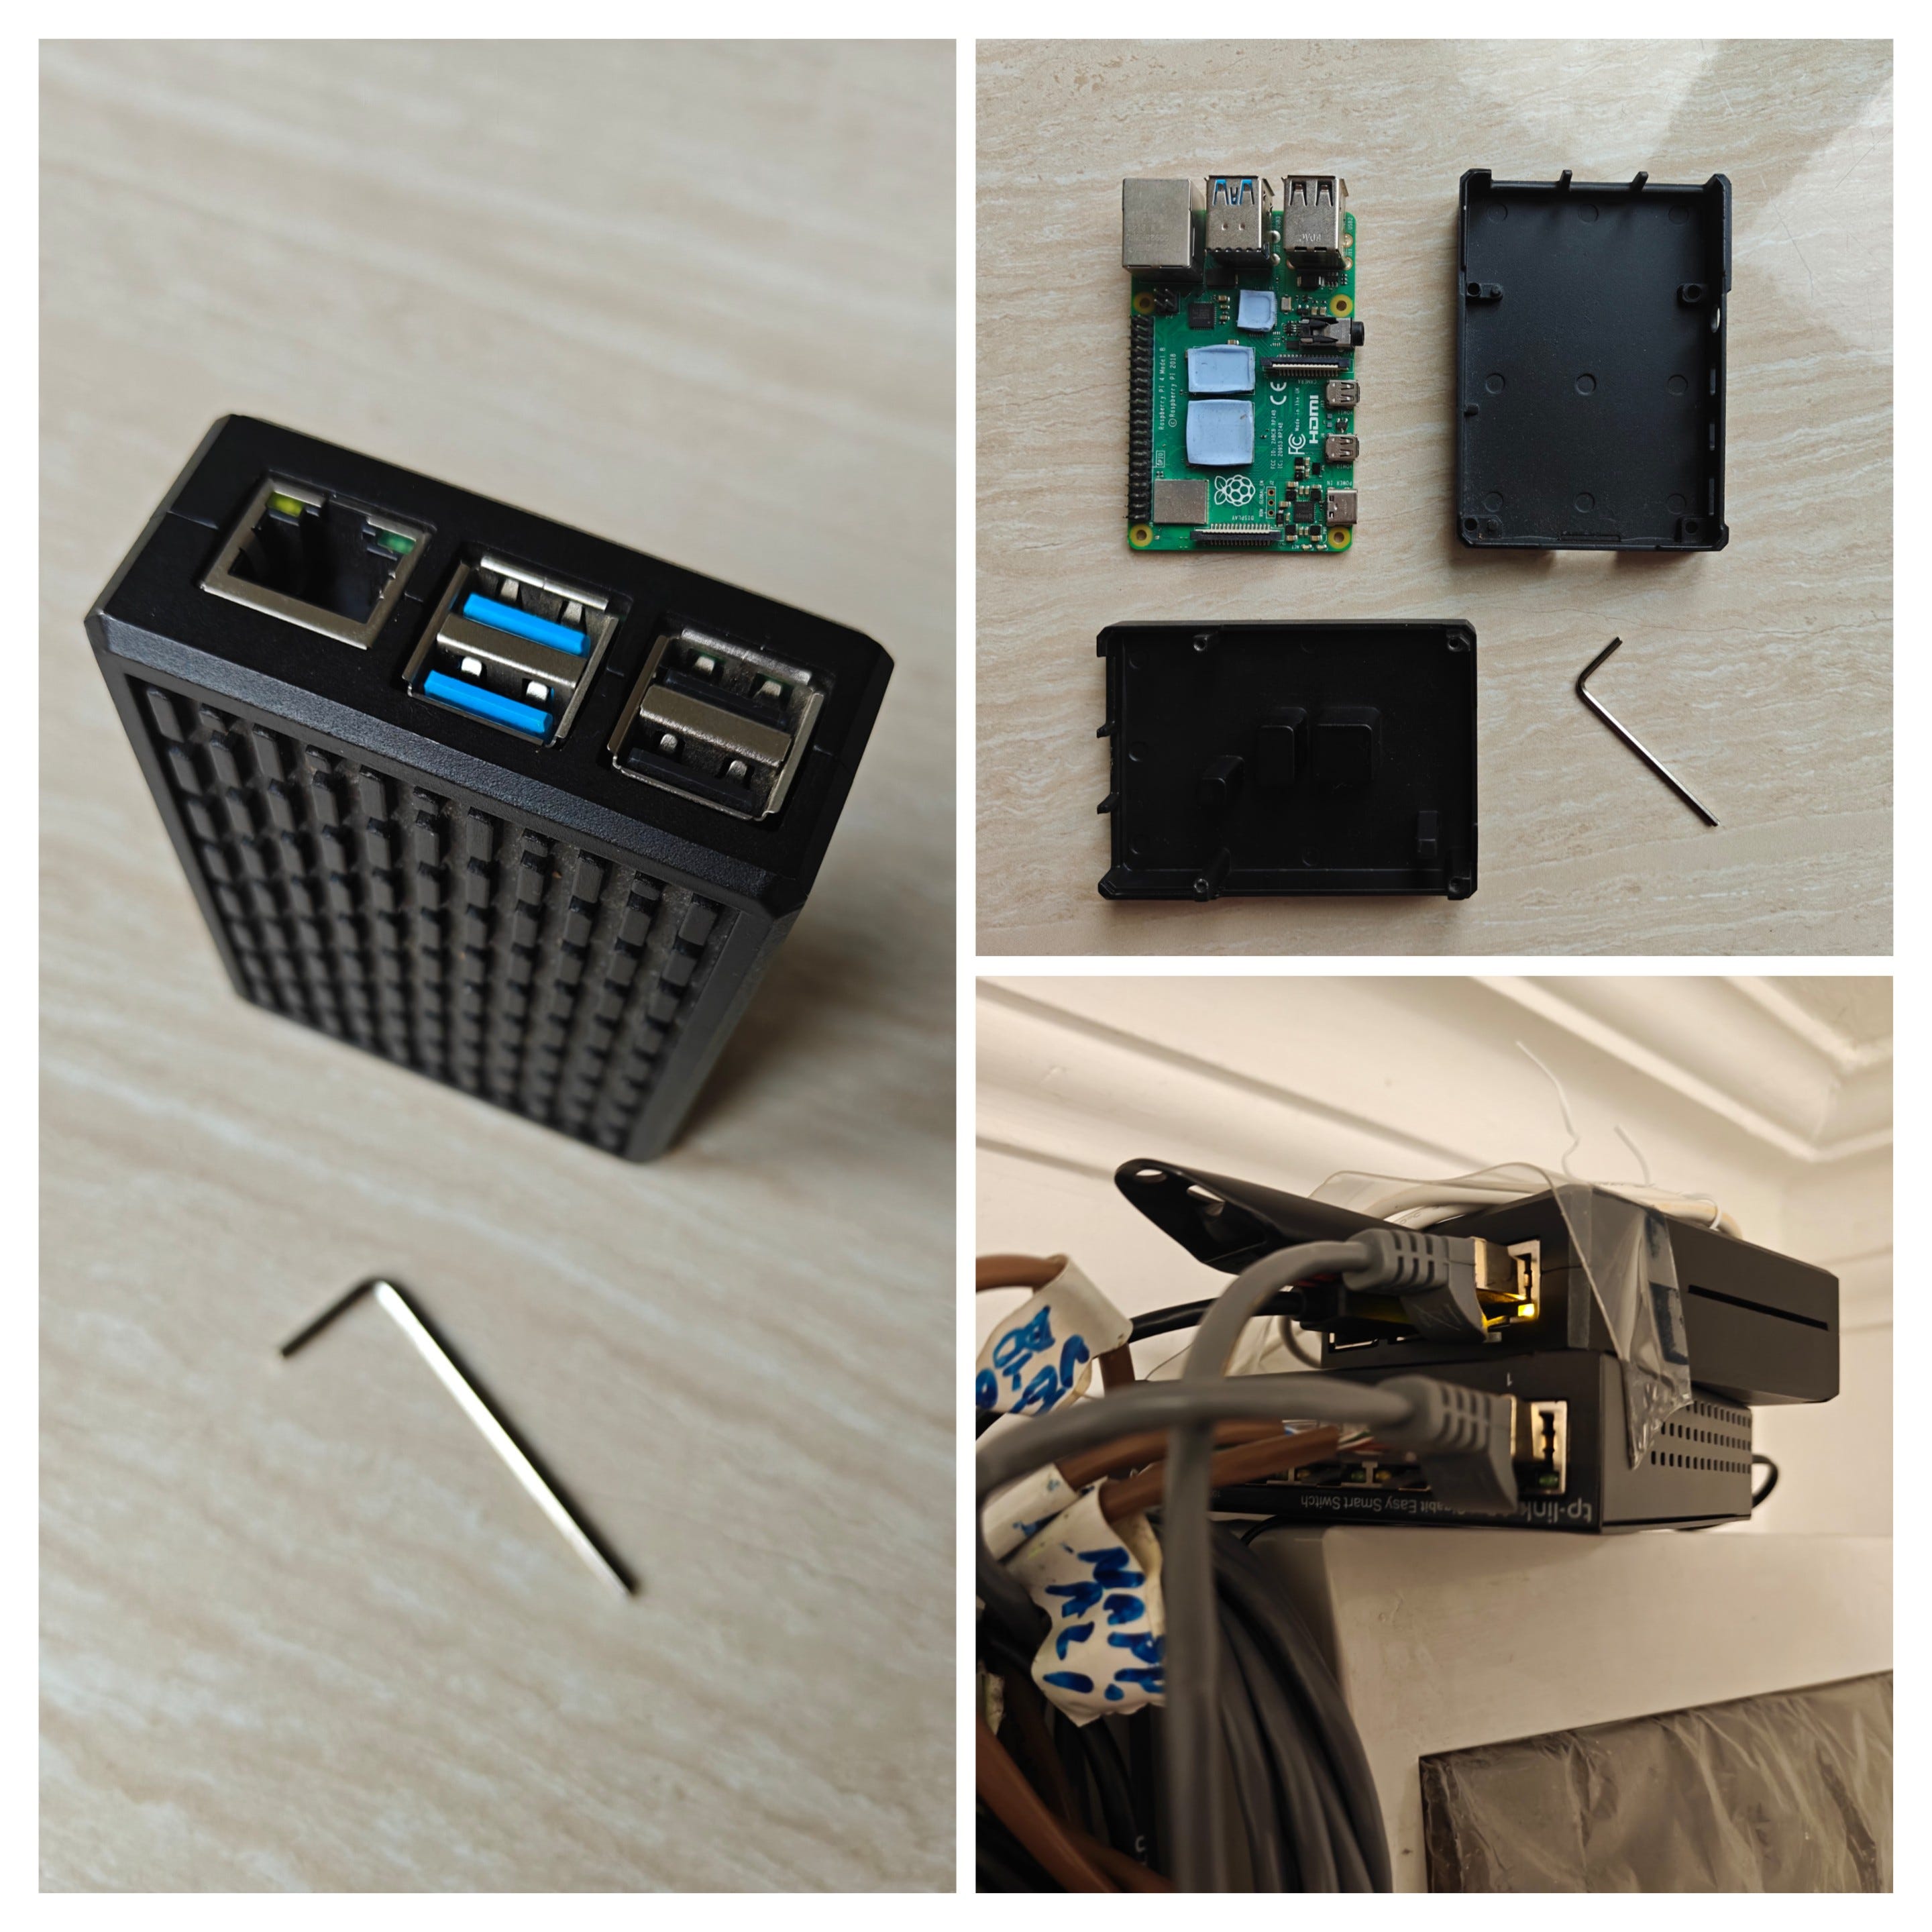
The foundation of any legendary build is the hardware. Consumer routers are often underpowered, sporting weak CPUs and meager RAM. The Raspberry Pi 4, however, is a beast. I almost went with the Nanopi R4S, but I could grab one Pi 4 dirt cheap on the 2nd hand market from a foreigner PhD student (metal case, flash storage, 3A power supply included). I didn’t need the GPU or the high consumption of the Raspberry 5.
The Brain: Raspberry Pi 4 (4GB RAM). This quad-core Cortex-A72 idles at 1% CPU utilization while routing Gigabit traffic —> enough spare for ntopng 😉
The Armor: A Full Metal Case. Passive cooling is crucial. This case acts as a giant heatsink, ensuring the Pi never throttles, no matter how much data I throw at it.
The Storage: A 32GB SanDisk Extreme USB 3.0 stick. We aren’t dealing with tiny 16MB internal flash chips here; we need room for Docker containers and logs.
The Radio: Two Deco Mesh units (in AP mode) are covering the home with fast WiFi without blind spots.
The Network:
WAN: An ASIX AX88179 USB 3.0 Gigabit Adapter.
LAN: The Pi’s built-in Gigabit Ethernet port (bridged to my managed switch)
The Firmware: Building custom OpenWrt
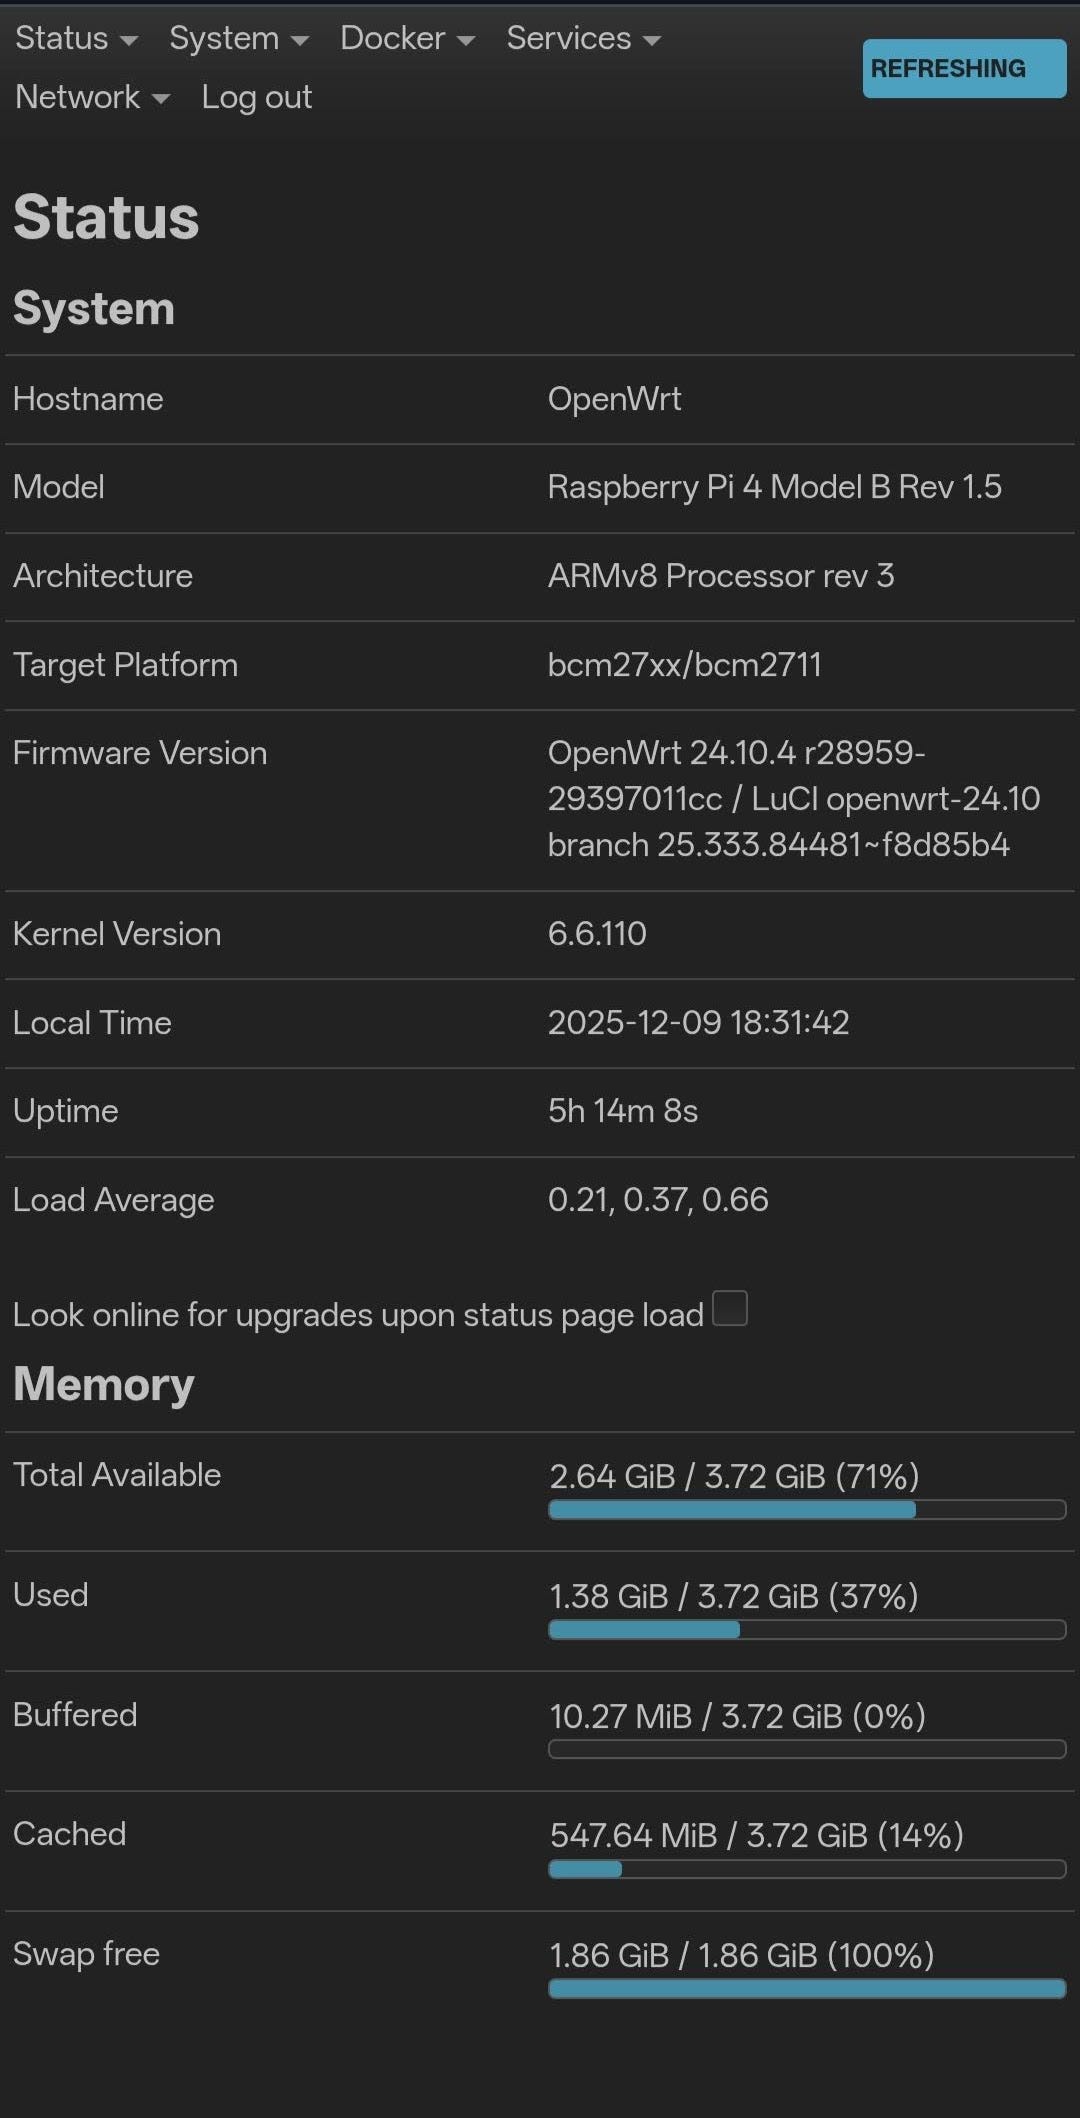
I didn’t just flash a standard image; I architected a custom OS. Most OpenWrt builds use “SquashFS,” a compressed, read-only system. I went straight for the Ext4 Factory Image.
I resized the partition using parted on a Linux PC to unlock the full 32GB of space. This turns the router into a proper Linux server, giving me room to grow forever. To solve the “Chicken and Egg” driver problem, I generated a custom image via the Firmware Selector, baking in SW tools and drivers so the router recognized the adapters instantly on boot:
Drivers (USB & Network)
kmod-usb-net-asix-ax88179(ASIX adapter support)kmod-usb-net-cdc-ether(Generic compatibility driver)kmod-usb-storage-uas(High-speed USB 3.0 storage)kmod-fs-ext4(Filesystem support)
System Tools
parted(Disk partitioning)resize2fs(Ext4 resizing)lsblk(Drive listing)usbutils(Commandlsusbto ID devices)nano(Text editor)htop(Resource monitor)curl(For downloading files reliably)ca-bundle&ca-certificates(SSL support for secure downloads)openssh-sftp-server(To transfer files from my phone)restic(For encrypted, deduplicated backups)
LuCI & Management
luci-app-sqm&sqm-scripts(Traffic shaping / Bufferbloat killer)luci-app-attendedsysupgrade(The firmware updater)luci-app-statistics(Graphs)collectd-mod-*(Various collectors for CPU, memory, thermal, etc.)
Part 2: The “Valley of Death” (Architecture Hell)
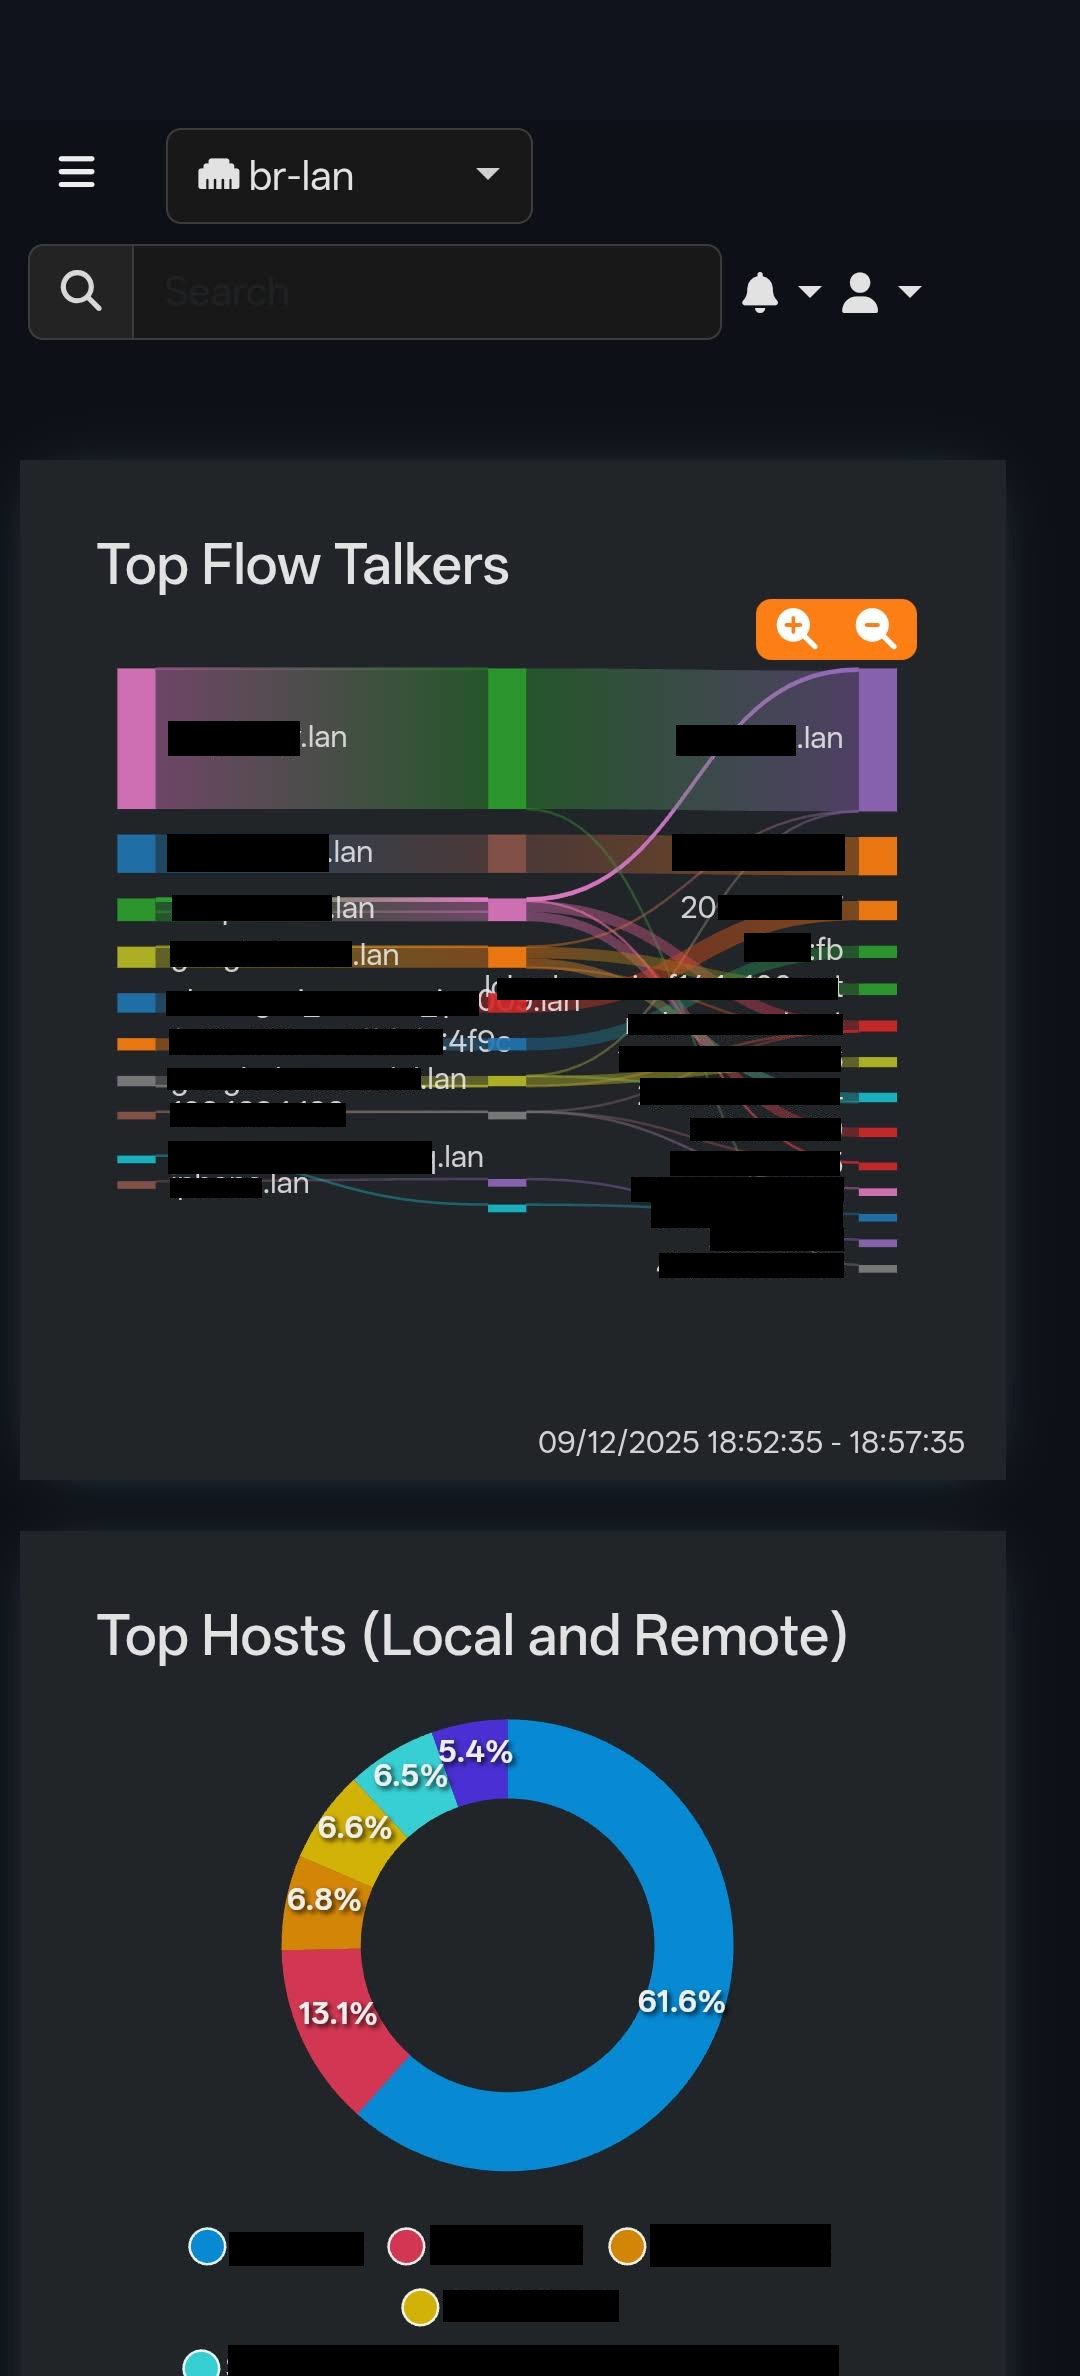
I wanted ntopng (the Ferrari of traffic analyzers) to see every packet leaving my house - real time. I wanted to see flow analysis, bandwidth usage by application (Netflix vs. Teams), and deep packet inspection.
The reality hit immediately. The error logs screamed: exec format error.
The official Docker images for ntopng are built for big Intel servers (AMD64). My humble Raspberry Pi runs on ARM64. Every “community” image I tried was broken or outdated.
The Nuclear Option
If you can’t buy it, build it. I engineered a custom Dockerfile to compile the container natively on the router itself using a debian:bookworm-slim base. It took 5 tense minutes of compiling on the Pi, but the result was a pristine, custom-built my-ntopng-arm64 image. No emulation. No crashes. Pure native speed.
You can see the moment when ntopng finally started:
(click the image to open)

Part 3: Protecting the Hardware:
The RAM-Only Strategy
Traffic analyzers are “Write-Heavy.” They log every connection to a database. If you run this on a USB flash drive or SD card, you will burn through the write cycles in 6 months. I implemented a “Volatile RAM” Architecture to make this system indestructible.
Tmpfs Magic: I instructed Docker to mount the ntopng data directory (
/var/lib/ntopng) directly into the Pi’s RAM using the--tmpfsflag. The application thinks it’s writing to a hard drive, but it’s actually writing to a virtual 1GB block of memory. Writes to USB Drive: Zero.Note: the visible I/O activity is from Netlink Bandwidth Monitor, which is collecting bandwidth statistics to the RAM and saves once in an hour. I am temporarily using it this month.
Redis on Diet: The database engine was configured with
--appendonly no. It lives entirely in the moment.ZRAM Compression: To prevent the 4GB RAM from filling up, I installed ZRAM, effectively squeezing 500MB of data into 200MB of actual RAM.
The result? A router that can analyze all my traffic 24/7 without slowdown, without placing a single gram of wear on the storage. The log rotation starts when the RAM stops increasing:

Part 4: Network Architecture & Split-DNS
A normal router just forwards DNS queries to Google. My router is the DNS infrastructure.
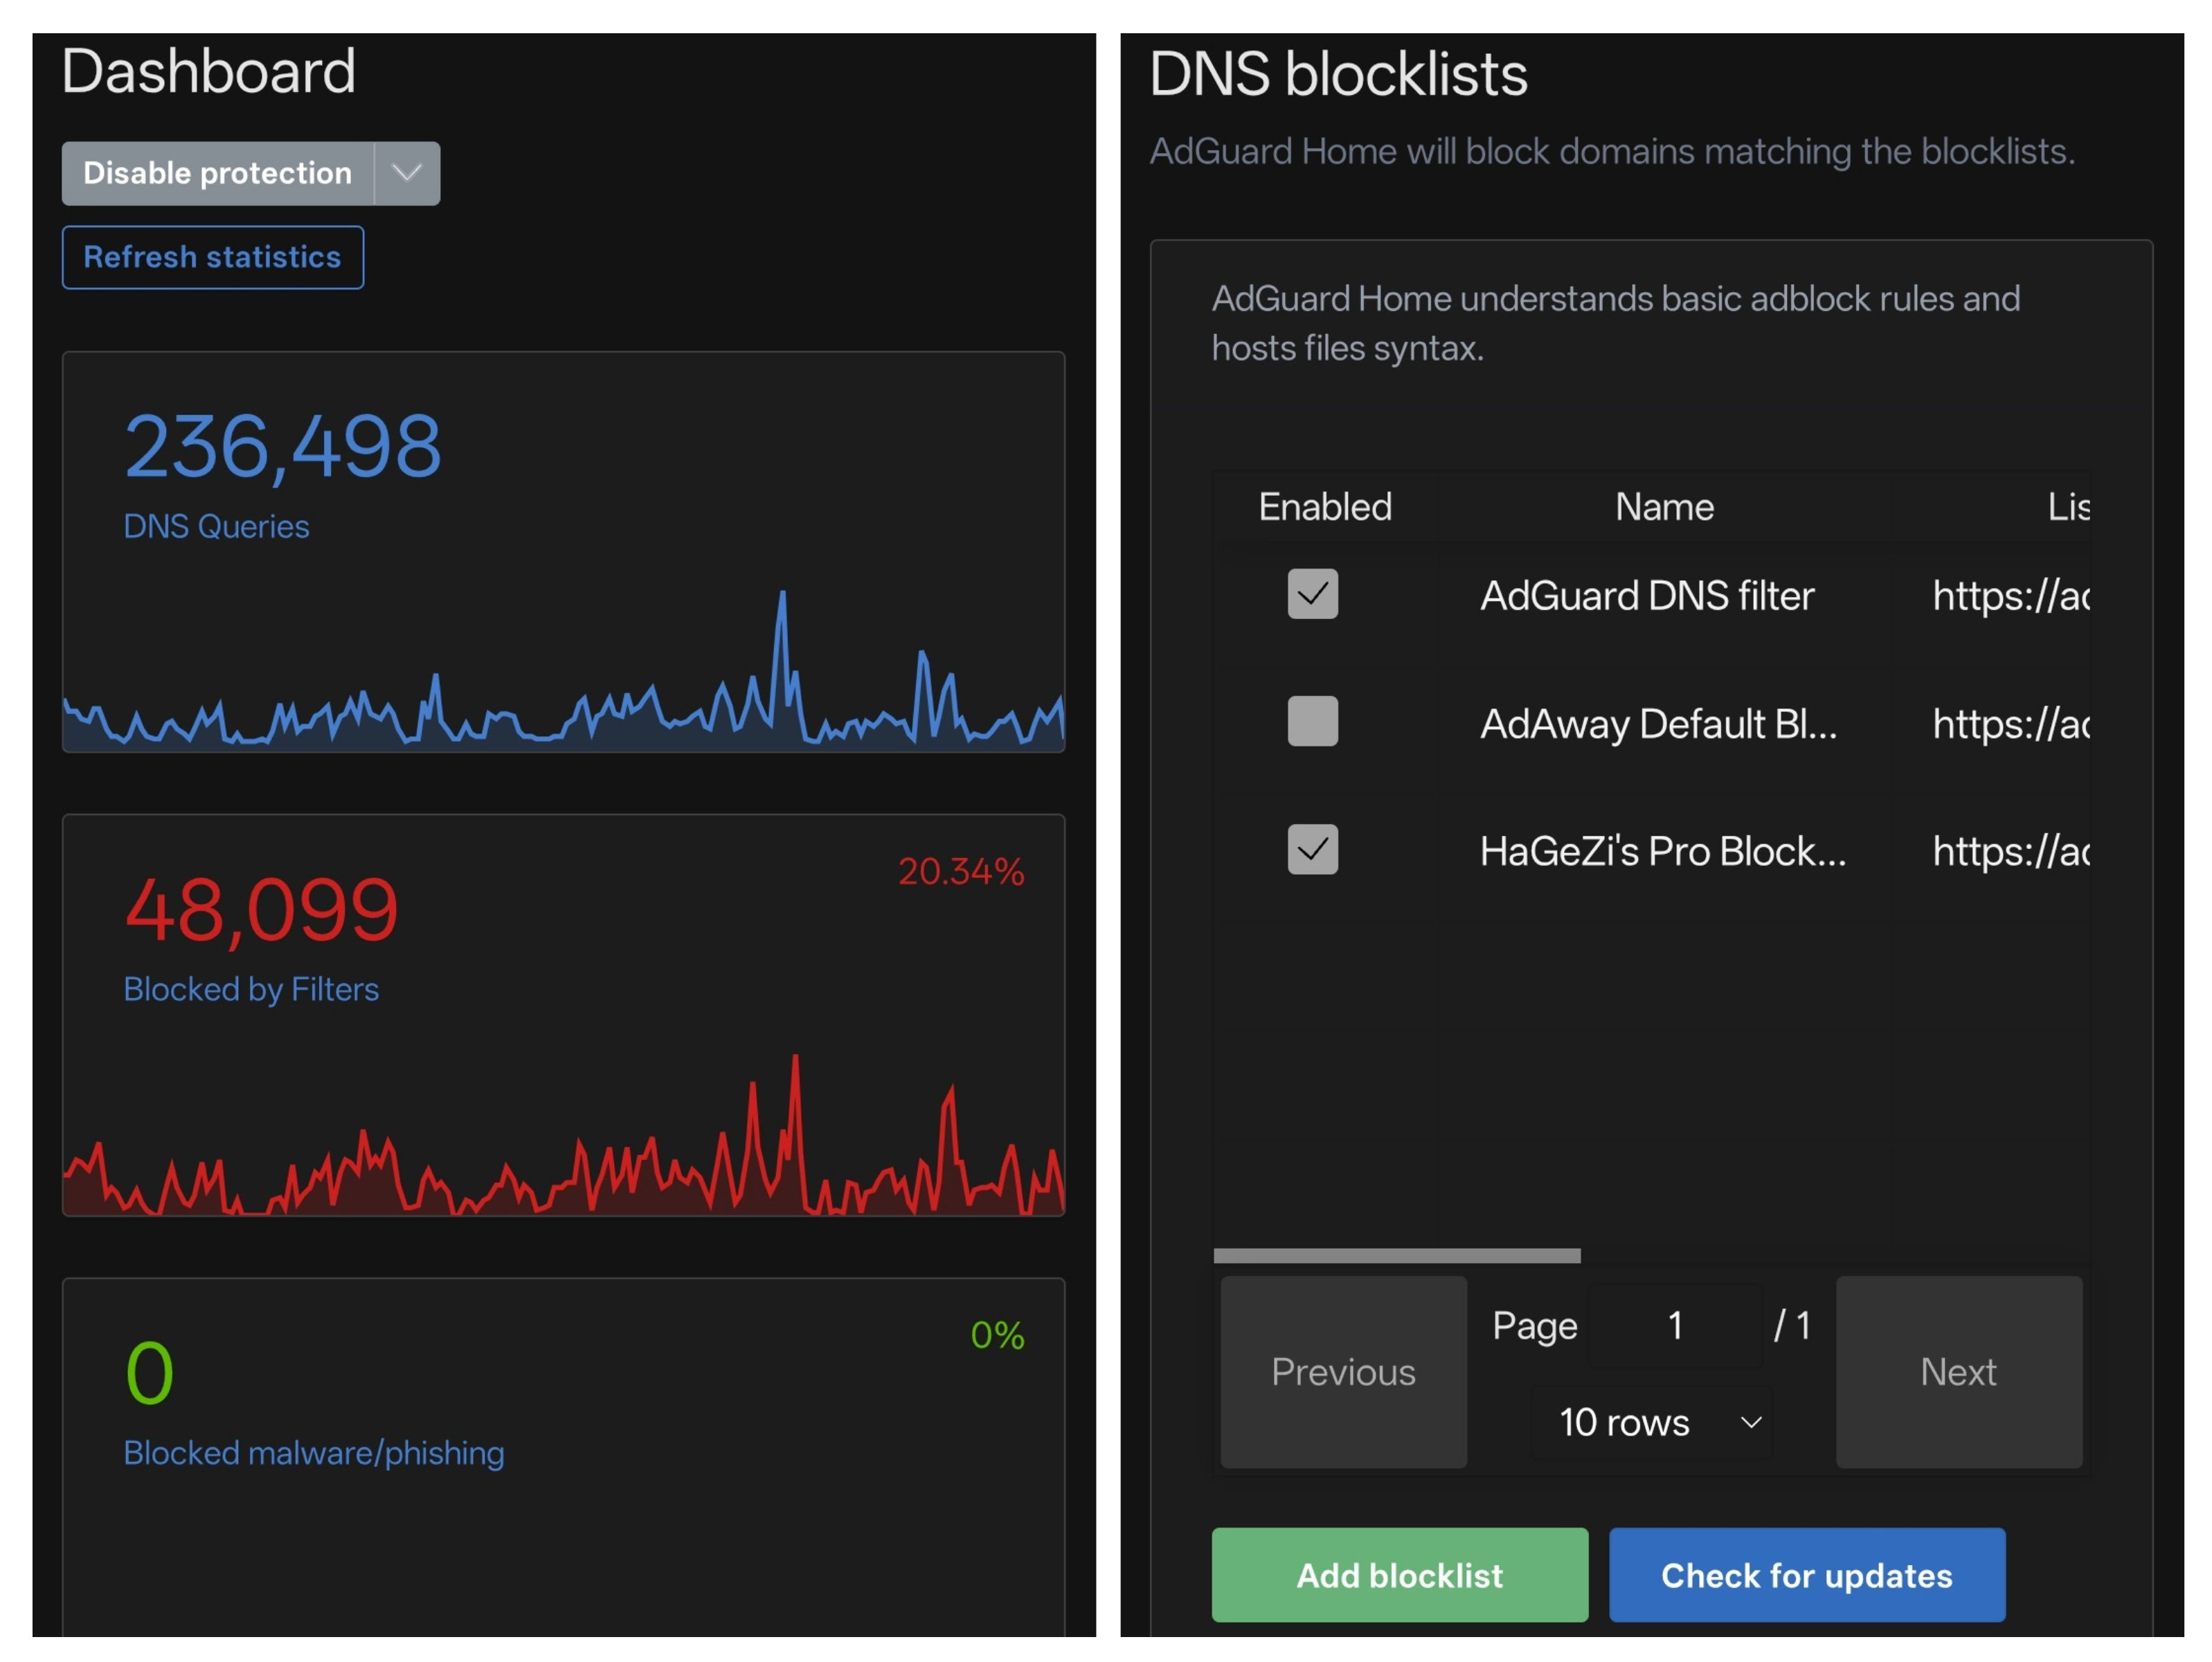
The AdGuard Strategy
I installed AdGuard Home directly onto the Router’s Ext4 partition. But I didn’t just run it; I integrated it for High Availability.
Port Management: I moved OpenWrt’s internal DNS (
dnsmasq) to port 5353 and gave AdGuard the prime spot on Port 53.The Failover: I already had a Raspberry Pi 3 running AdGuard. I configured DHCP Option 6 to announce the Pi 3 as Primary and the new Router as Secondary. If one device dies, the other takes over DNS blocking instantly. Zero downtime.
HaGeZi's Pro Blocklist is making sure that all of my devices are tracker and adfree
Seeing Through Walls (Breaking NAT)
Initially, ntopng only saw traffic coming from the router due to NAT masking. To fix this, I pointed the analyzer at the Bridge Interface (br-lan) rather than the WAN port.
To resolve IP addresses to names (so I see “Projector” instead of “192.168.1.50”), I built a Split-DNS Bridge. I injected a custom resolv.conf into the Docker container, forcing it to ask the router for local names. Suddenly, the dashboard lit up with full Layer-7 visibility.
Part 5: The “Forever” System:
Automated Resurrection
A router this complex needs an insurance policy. I didn’t settle for the basic “Save Config” button.
The “Recipe” Backup: Instead of backing up gigabytes of Docker data, I configured Restic to backup only the configuration—the “Recipe” (Dockerfile) and the “Restore Script.”
Cloudflare R2 Sync: I wrote a custom script that uses Restic to sync my weekly snapshots to Cloudflare's R2 storage every week. It’s encrypted, off-site, and free.
The Restore Script: I wrote a master script that automates the entire rebuild. If I flash a new OS, I run one command. It reinstalls Docker, rebuilds the custom image, and spins up the containers with the correct RAM limits.
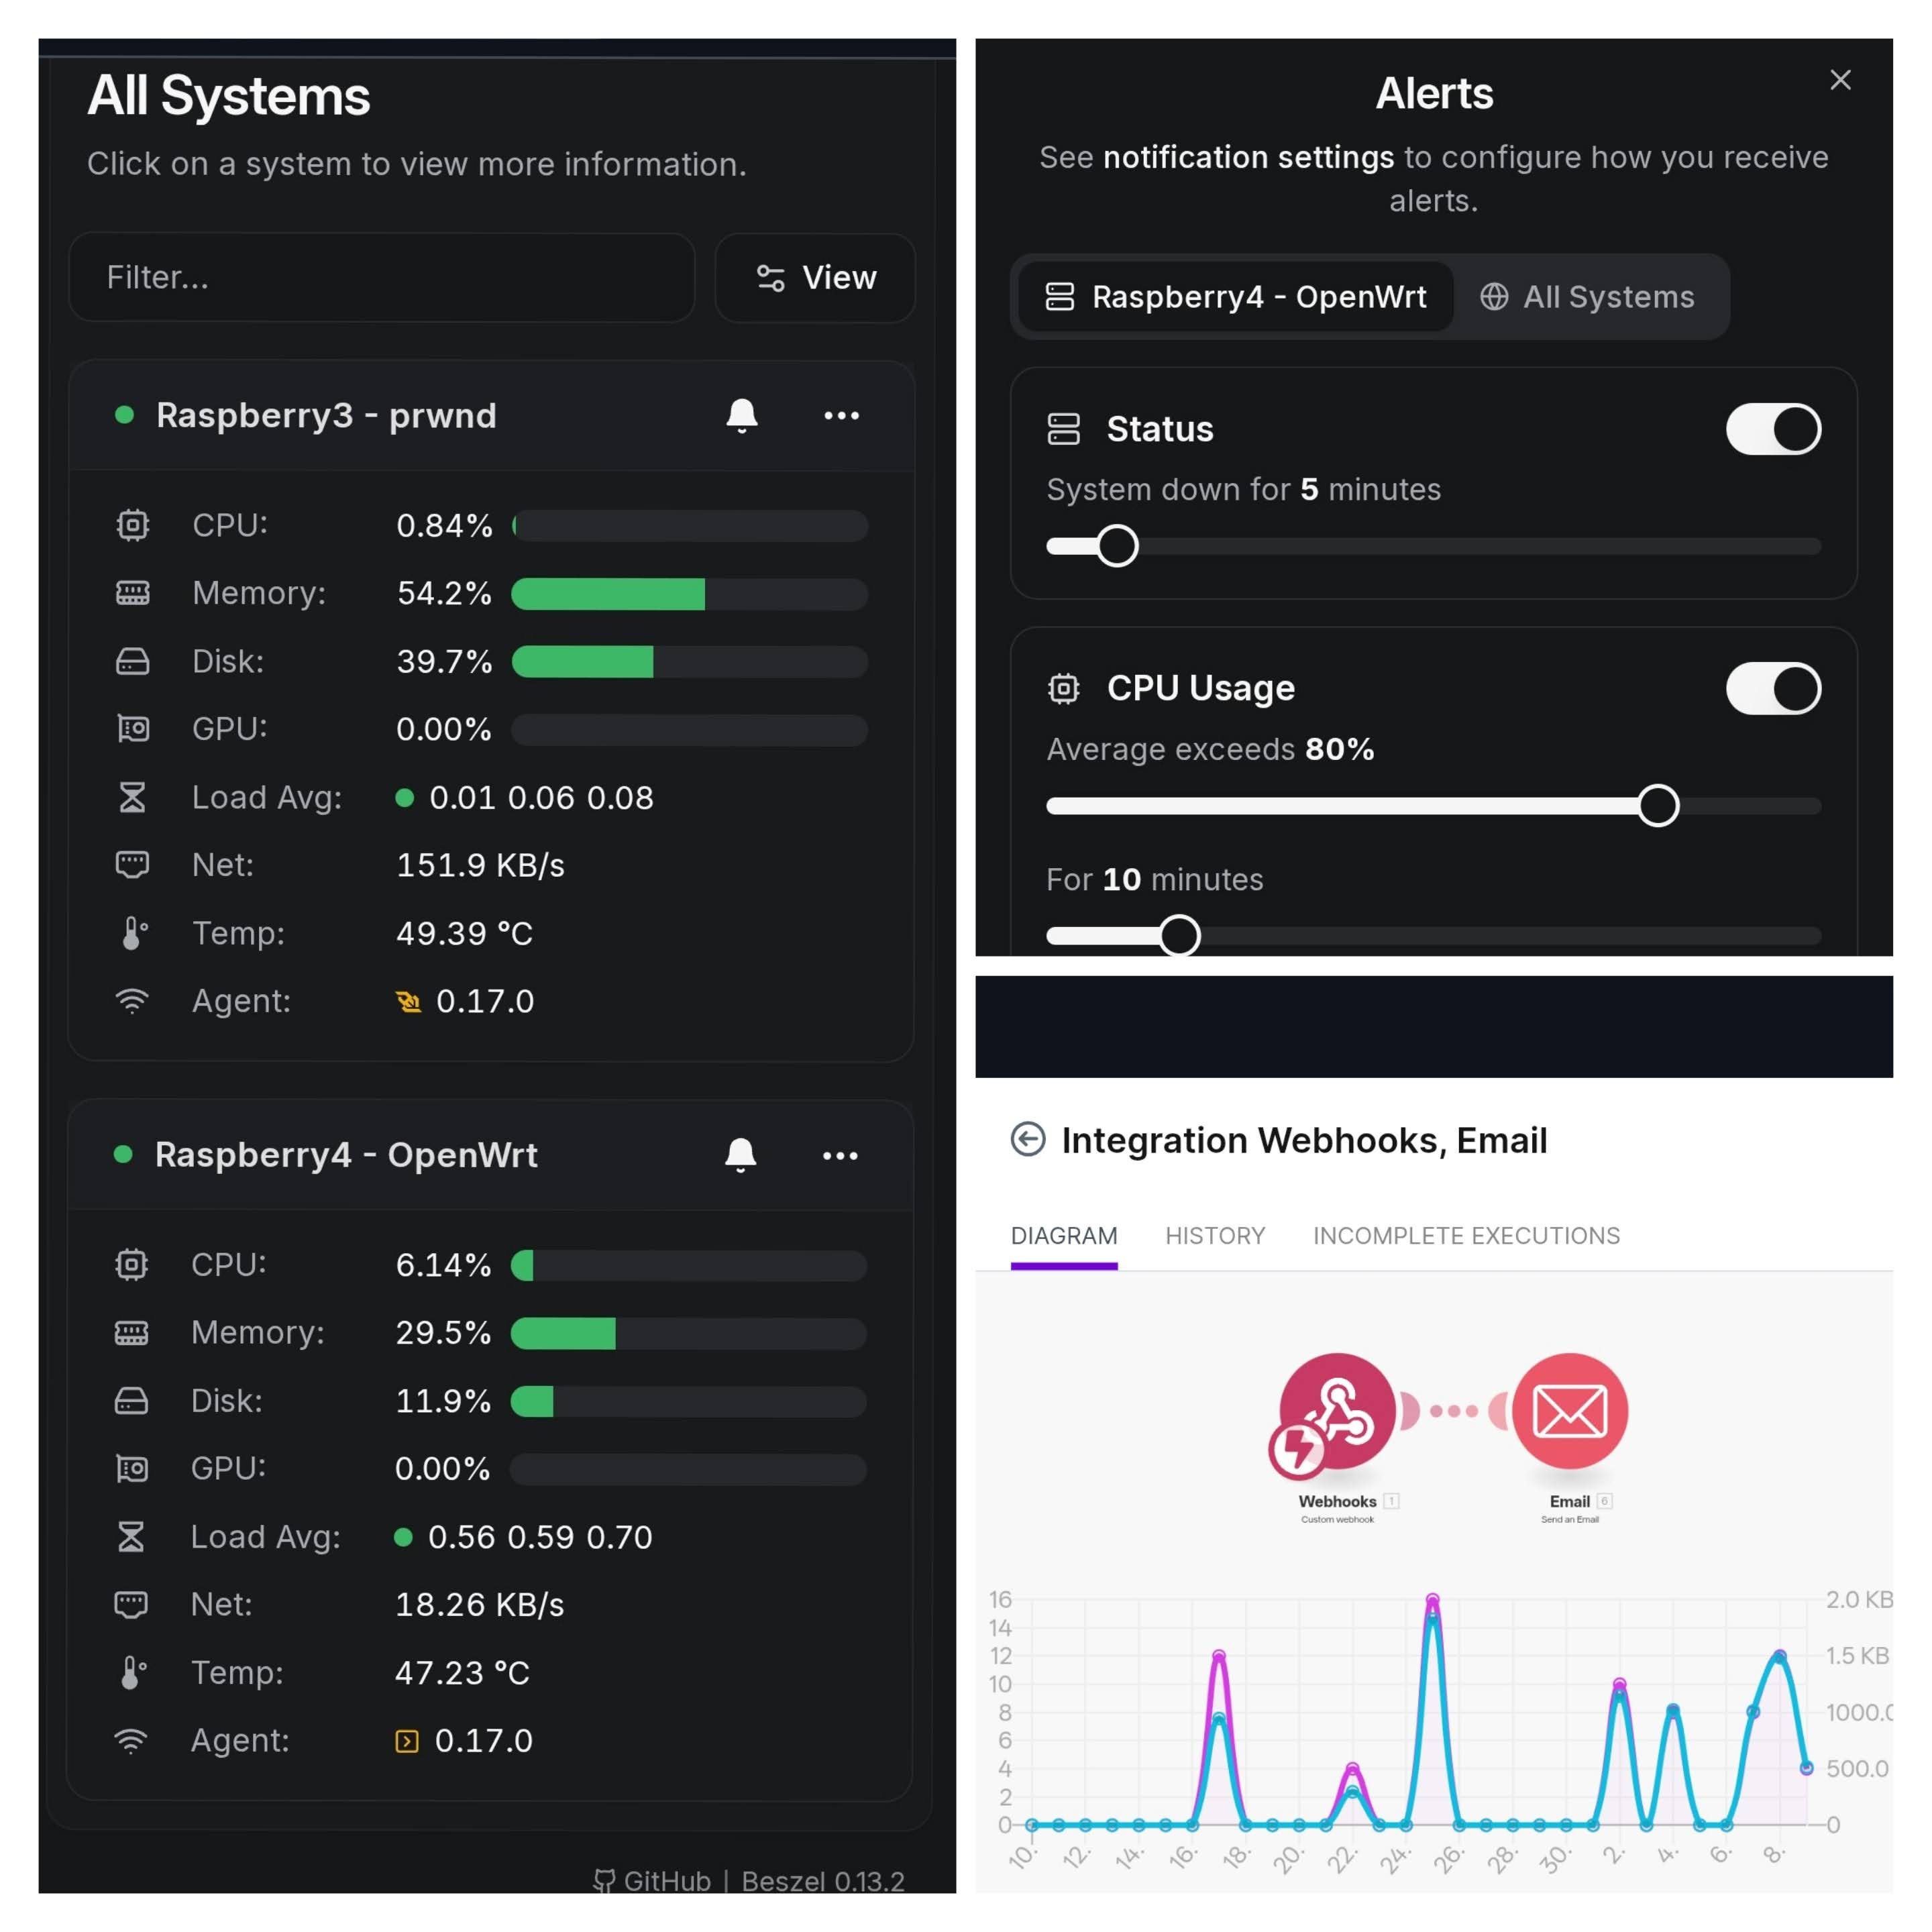
+1 IF anything is out of my pre-set threshold beszel.dev immediately sends an E-mail alert via make.com webhook automation:
Status, CPU, Memory, Disk, Bandwidth, Temperature, Load
The Result
I started with a $50 board and a pile of error messages. I ended up with a network appliance that rivals hardware costing ten times as much.
I now have a router that:
☝️Blocks Ads and Trackers: Network-wide with redundant failover
☝️Sees Everything real-time: Full Layer-7 Deep Packet Inspection
☝️Never lags: Thanks to SQM Cake QoS handling bandwidth
☝️Runs Cool: Passive metal cooling + ZRAM anti-crash protection
☝️Is Immortal: Real time monitoring with auto-backups with self-healing scripts

+1 in the end:
I also did not forget to move my IoT devices to a VLAN separated network 😀

This isn’t just a router; it’s the central nervous system of my digital life. And the best part? I built it myself. If you are still running the plastic box your ISP gave you, you are missing out. Grab a Raspberry Pi 4, and have fun.
Final verdict: Is it wife approved? 🤔
It is if she doesn’t know 😉